
Add a Consignment to Planned Journeys
Once the new journey is created, we add a consignment to the planned journey as follows:
Method 1:
Step 1: Filter the consignment number that will be added to the planned journey.
Step 2: Within the consignment box, click on the “Assign to Journey” option:
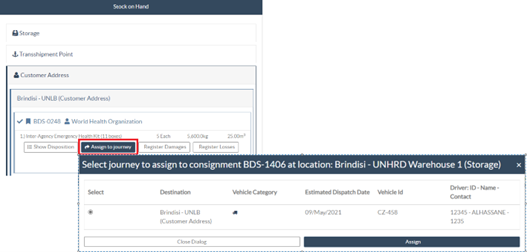
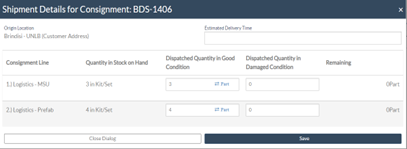
Step 3: Select the Journey planned for the cargo and click on the “Assign” button. Within the box, provide the Delivery Time as well as the quantity to be shipped. The users can ship full items in the SRF or only part of the items on the SRF. RITA also allows the operator to input the quantity in damaged condition.
Finally, click ‘Save’, and the cargo will be added to the journey selected.
Method 2:
Step 1: Filter the consignment number that will be added to the planned journey.
Step 2: Select the consignment to be loaded, and "drag and drop" the consignment to the desired journey by clicking and holding the mouse button.
Step 3: Within the box, provide the Delivery Time as well as the quantity to be shipped. The users can ship full items in the SRF or only part of the items on the SRF. RITA also allows the operator to input the quantity in damaged condition.
Finally, click ‘Save’, and the cargo will be added to the journey selected
Move Consignments Between Planned Journeys
If a cargo from a consignment is already assigned to a journey, and a RITA operator wishes to assign the already assigned consignment cargo to a new journey, they may drag and drop the assigned consignment cargo directly between two planned journeys
Prior to moving cargo to a new journey, the new journey will still need to be created first.
If RITA operators do not drag and drop assigned cargo, they can also cancelled the assigned journey for the consignment and reassign the consignment to a new journey at a later date.
Canceling an Assigned Journey for the Consignment
If the operator needs to cancel the assigned journey, follow the steps below:
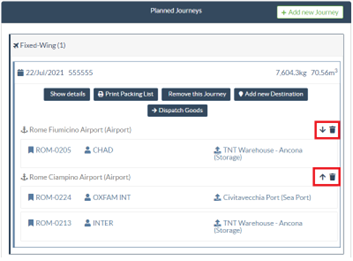
Step 1: Go to the “Dispatches” tab and click on “Planned Journeys.”
Step 2: Clicking on the journey will show the nested information: the journey date, vehicle ID, weight, and volume of the consignment. Further clicking on it will show additional information such as the consignment number, organization, and pickup address.
Step 3: Click the delete icon next to the details to delete the consignment assigned to the journey.
Following the above steps, the dispatch will be reversed, and the consignment will be moved back to “Stock on Hand” or “Cargo Awaiting collection” section depending upon the service type requested.
Confirming a Dispatch
Once the cargo has been added to the journey created, the operator will click on Dispatch Goods to dispatch the cargo in the system.
Step 1: Click on the journey type (Fixed Wing/Road/Sea/Pack Animals, etc.) and click on the consignment that needs to be transported.
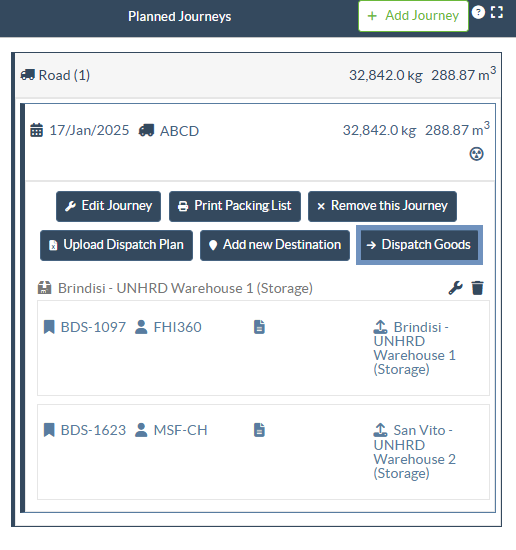
Within the box, the operator will see the following options:
Show Details: It shows the Journey details provided by the operator while planning a journey.
Print Packing List: The packing list is the shipment receipt that can be attached to the waybill for confirming the dispatch of the cargo.
Remove this Journey: This option allows the operator to delete the journey created. If the cargo is already allocated to the journey, this act will simply return the planned cargo to the “Stock on hand” or “Cargo Awaiting Collection” section.
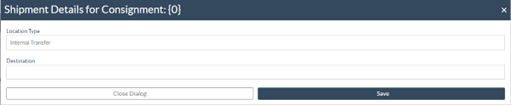
Add new Destination: This option allows the operator to add a new destination and location type to the planned journey.
Step 2: Dispatch Goods: Select the consignment and click on “Dispatch Goods” to confirm the dispatch.
 | Once the dispatch has been completed, the consignment will move to “Receive from a site/customer” screen where the operator must confirm the reception at the destination, See Chapter “Receiving Cargo”. |
When the operator clicks on “Dispatch Goods”, the following window will popup:

Actual Date of Dispatch: It allows the operator to enter the actual date of dispatch for the items.
Number of Pallets: RITA operator can specify the number of pallets loaded on the vehicle added to the journey.
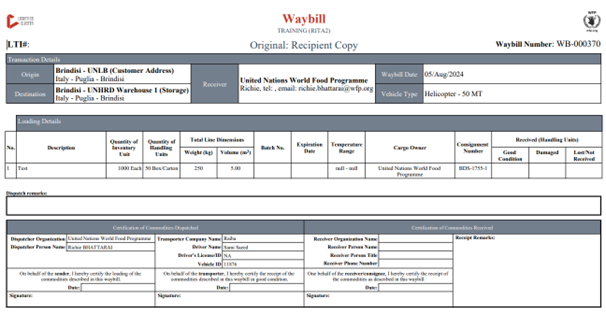
Print Waybill after dispatching: This feature allows RITA operators to automatically generate waybills when dispatching cargo. Please note:
- Waybills are only printable at the time of dispatching cargo, not before.
- Waybills can always be printed after the fact.
Manual Waybill: If managers choose not to use the automatically generated waybill, they can manually enter the waybill number. There are three methods for entering the journey waybill number:
- Manual Waybill: RITA operators can input a unique waybill number for each consignment or use a generic one for all consignments dispatched under one journey.
- Manual Waybill, one waybill number for each destination: This option enables the operator to include a location-specific waybill number for each destination in the planned journey.
- Manual Waybill, one waybill number for each destination and receiver: Operators can enter the waybill numbers for each destination and receiver, allowing multiple waybill numbers per customer if there are multiple receivers in the same destination
|
