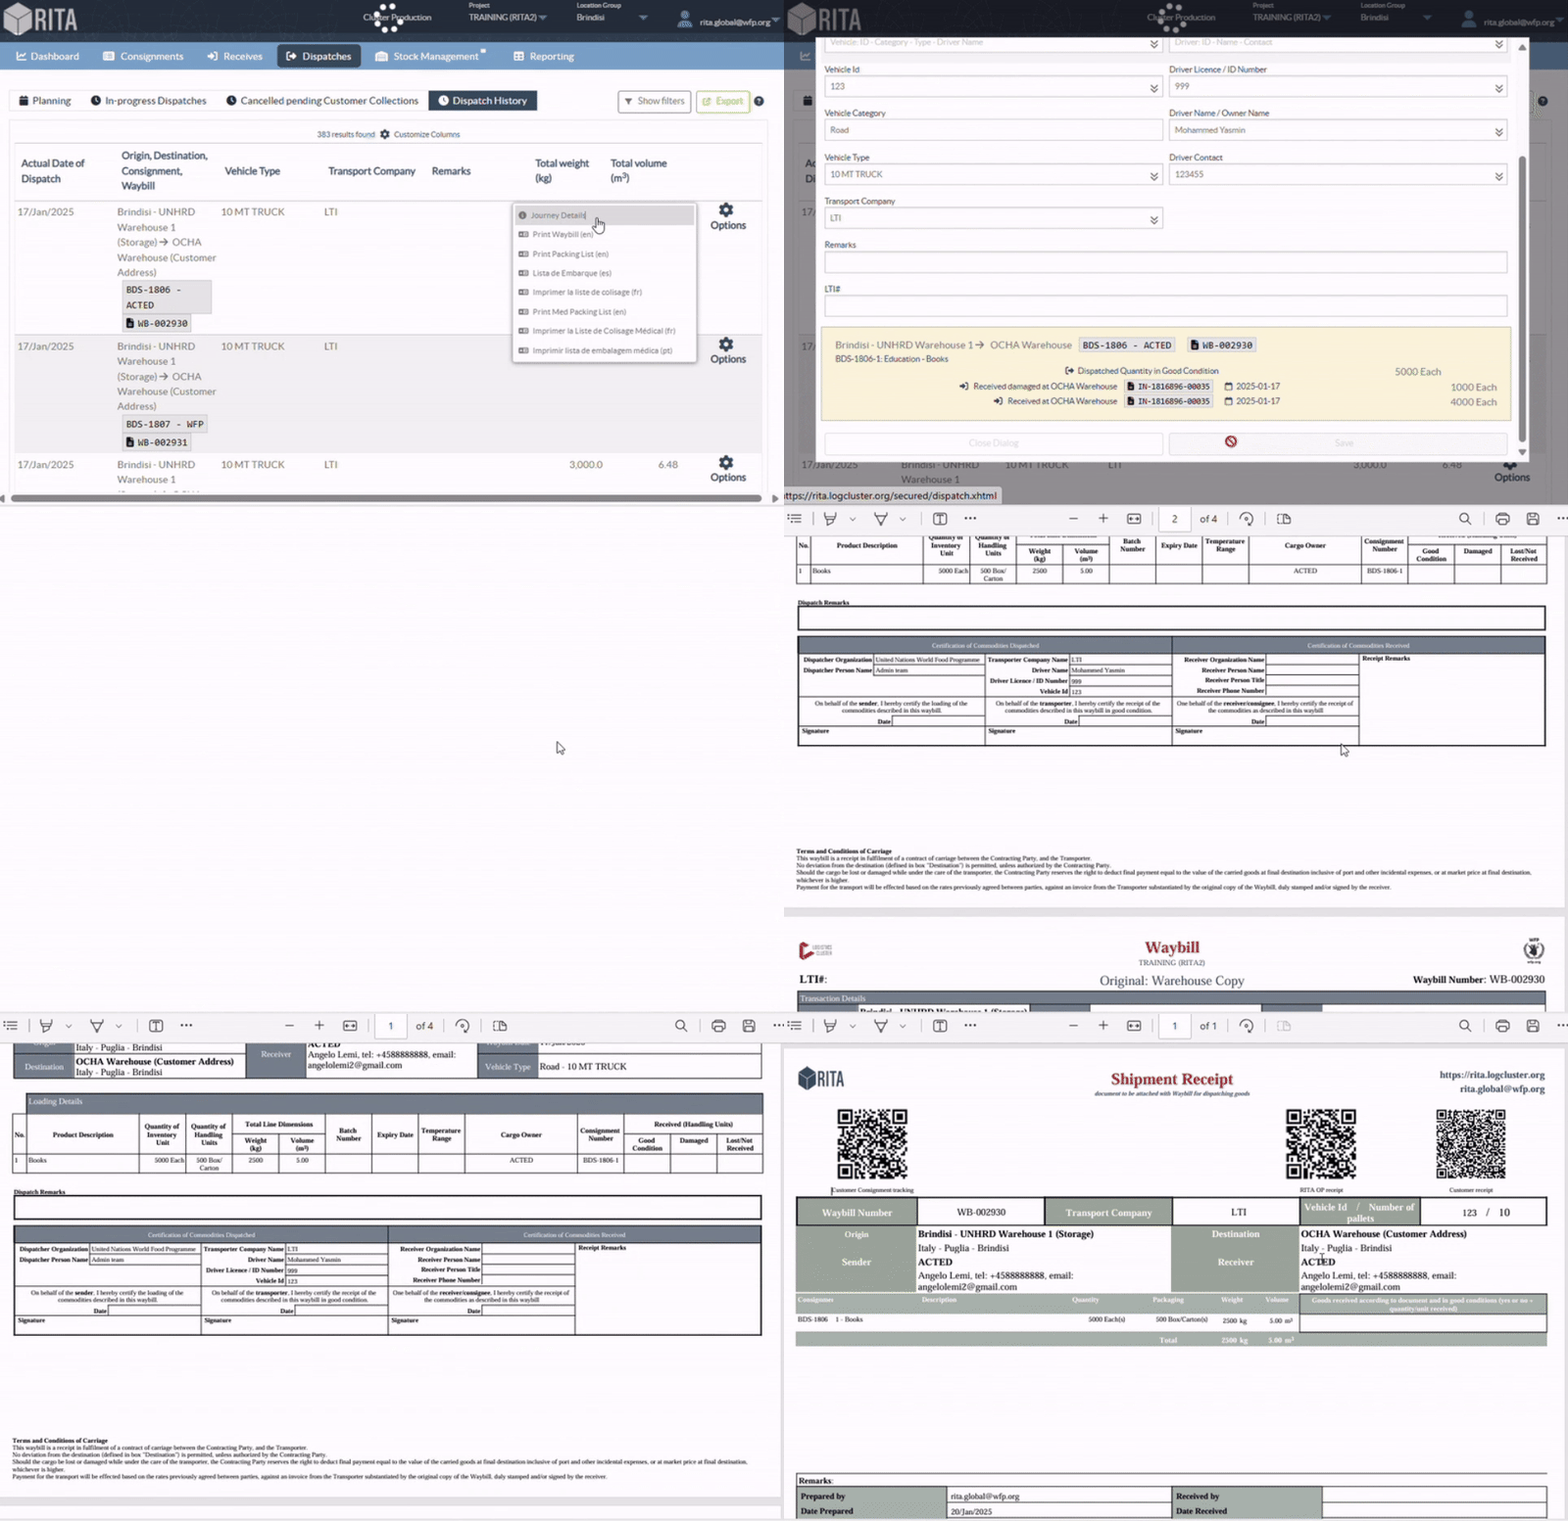
The dispatch History page lists all dispatches from the current location group confirmed as sent.
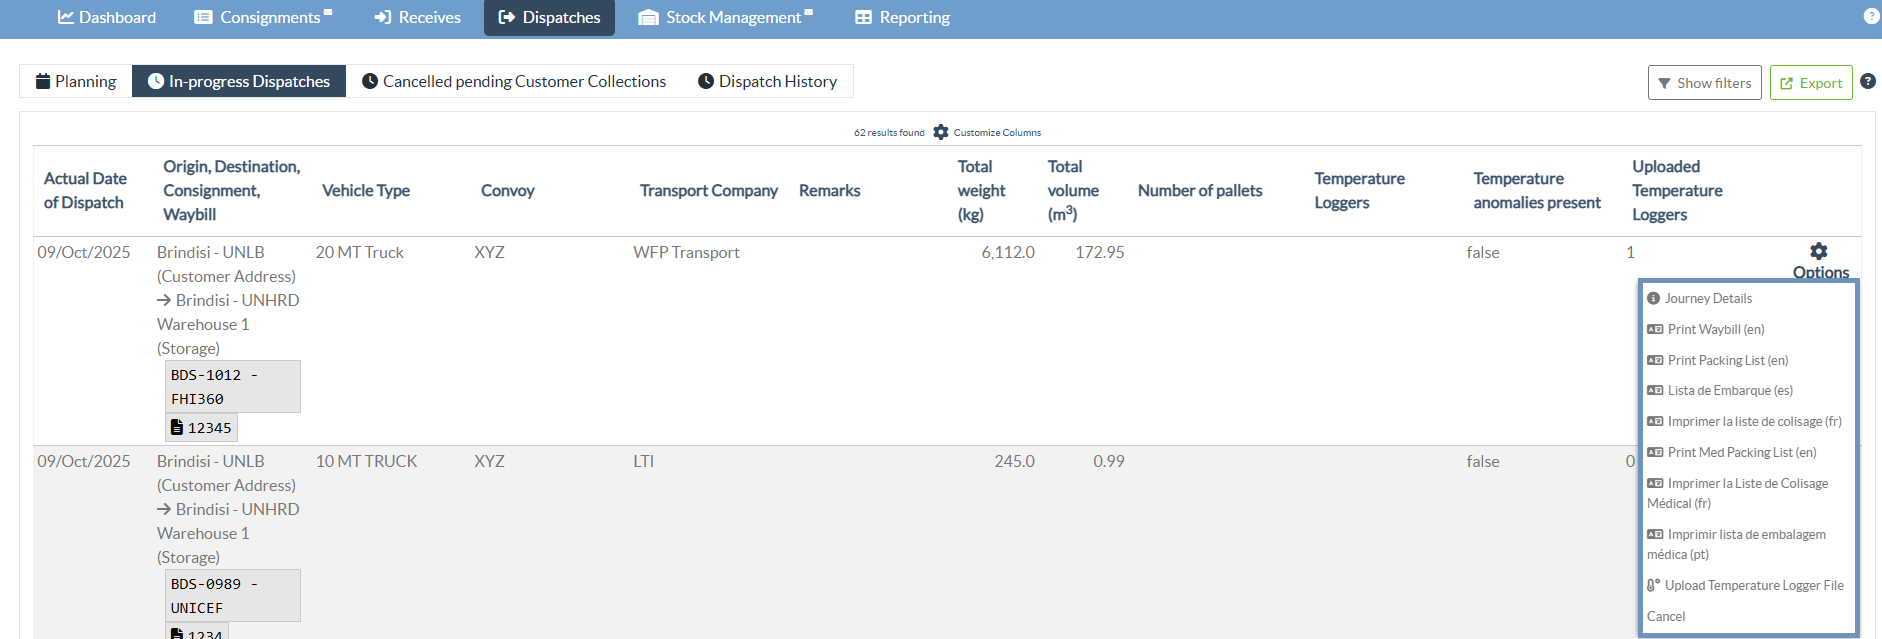
A dropdown menu appears when clicking on the options tab. The RITA operator can view the journey details, print waybills, and view the packing list of the cargo dispatch.
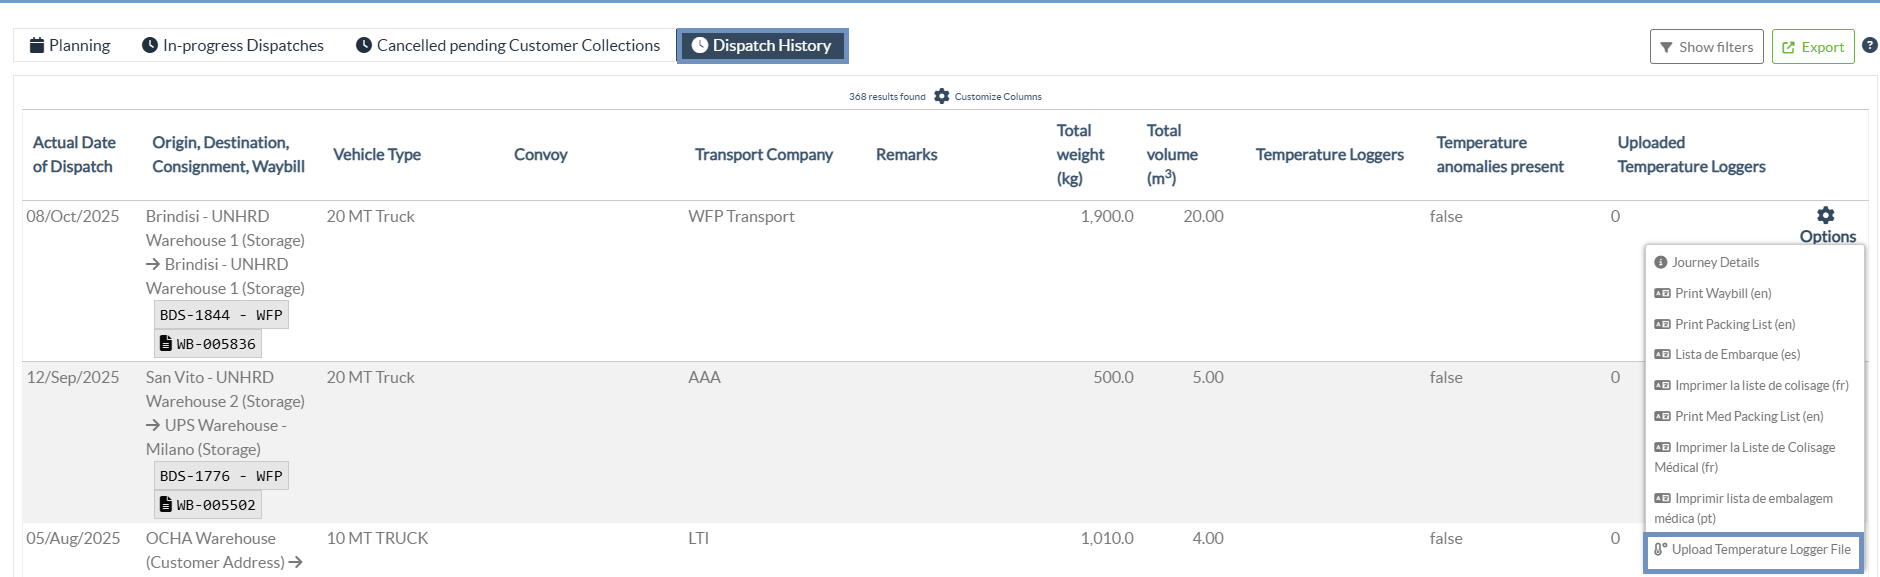
Upload Temperature Logger File
The "Upload Temperature Logger File" function allows operators to attach temperature data collected from pre-defined temperature data logger devices during the transport of consignments, ensuring that all temperature-controlled movements are properly monitored and recorded.
Step 1: Go to the "Dispatch History" tab and click on the option “Upload Temperature Logger File.”
Step 2: Define the "Equipment Name" and attach the corresponding temperature logger file. The operator can either click “Choose File” or use the drag-and-drop feature to upload the file directly into the drop zone.
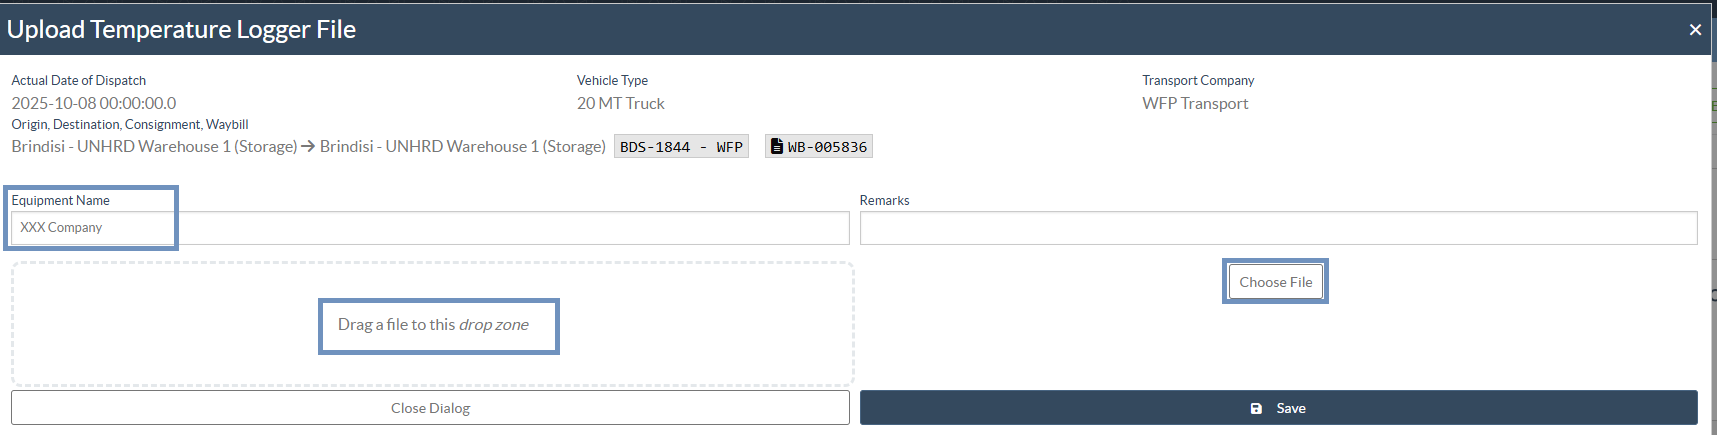
Note: Only specific file formats from specific devices in .CSV and .TXT are currently supported for upload.
Step 3: Add any relevant Remarks and click “Save.”
Once saved, the uploaded file will be linked to the respective journey or convoy, allowing authorized users to view and analyze the temperature records for verification and compliance.
Journey Details:
Clicking on “Journey Details” displays the complete information related to the selected journey. This includes journey-specific data such as Convoy Name, Vehicle Category, Vehicle Type, Transport Company, Driver Information, Dispatch Priority, and the Defined Route. Operators can also view the Temperature Logger field, which indicates whether the journey includes temperature-controlled cargo and the specific temperature range selected (e.g., Cool: 8 to 15°C, Frozen: Below -20°C).
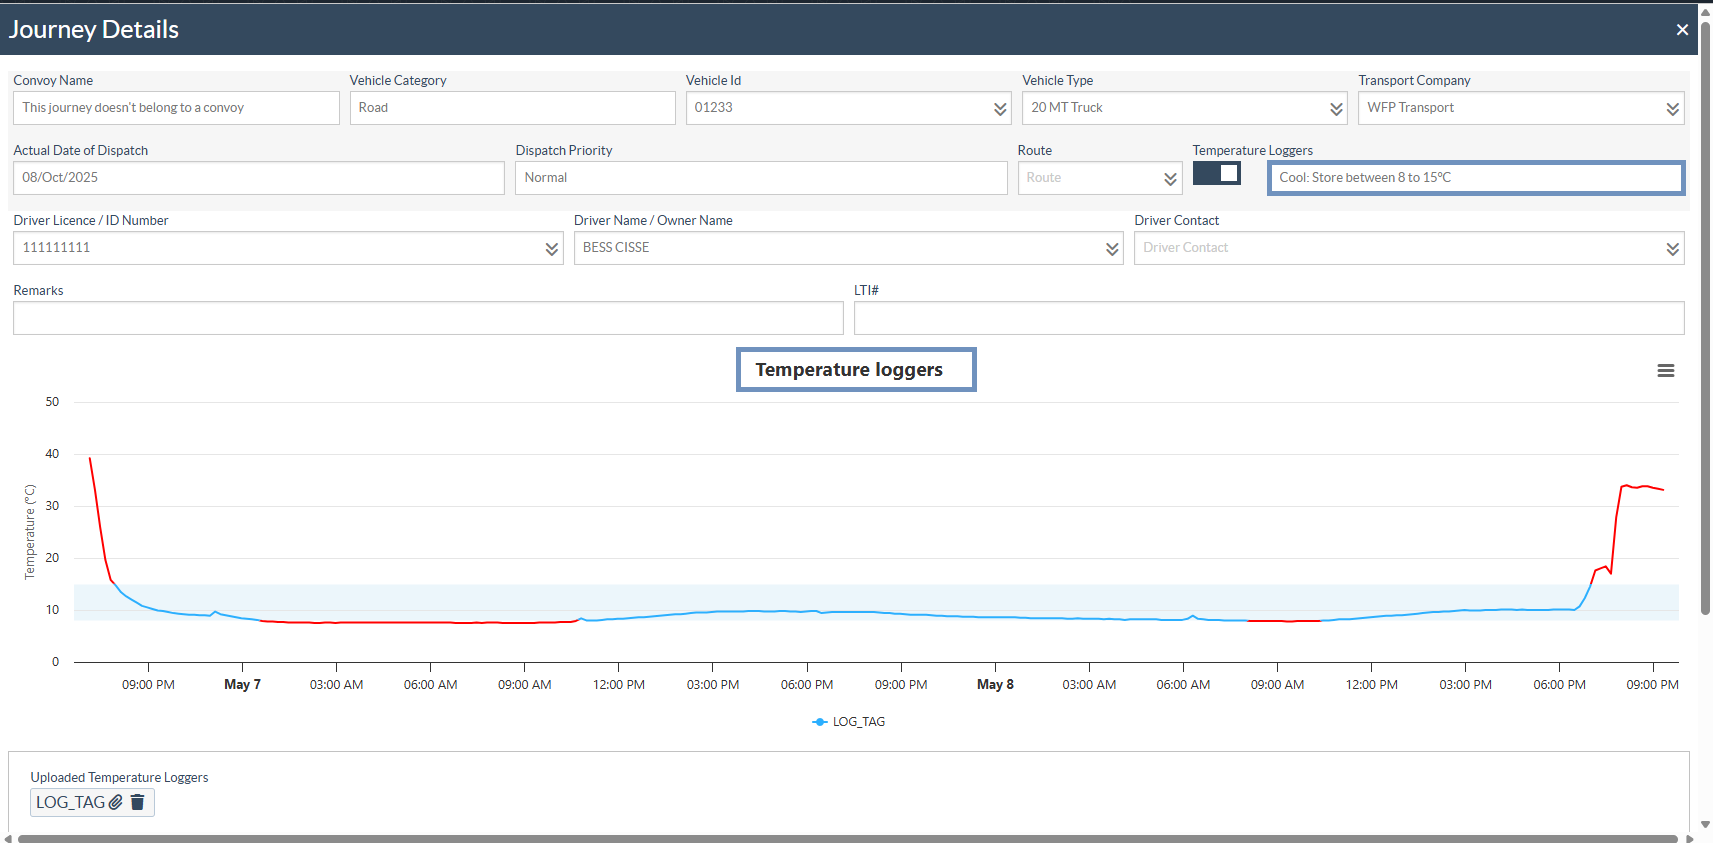
Temperature Monitoring Graph:
At the bottom of the Journey Details window, the system displays a temperature monitoring graph generated from the uploaded data logger file. This graph visually represents the temperature variations recorded throughout the transport period, helping operators verify whether the shipment maintained the required temperature range.
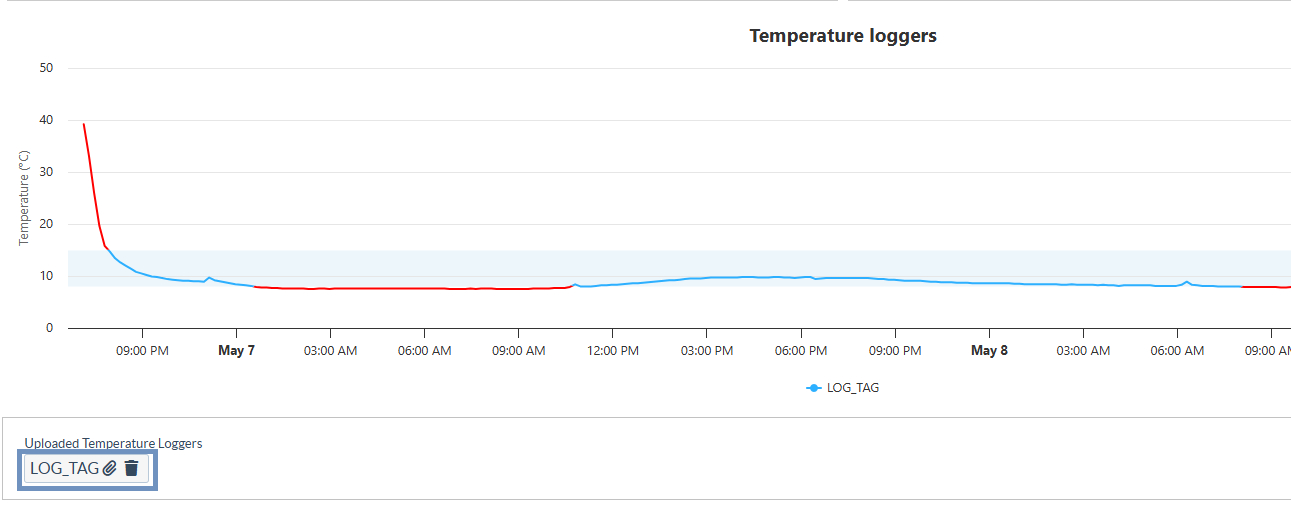
Uploaded Temperature Loggers:
Uploaded temperature logger files are listed under the “Uploaded Temperature Loggers” section, where operators can review the file name, download, or delete the record if necessary.
 | The Delete option is restricted to users with PRA (Project Administrator) rights due to the sensitivity of temperature monitoring information. |
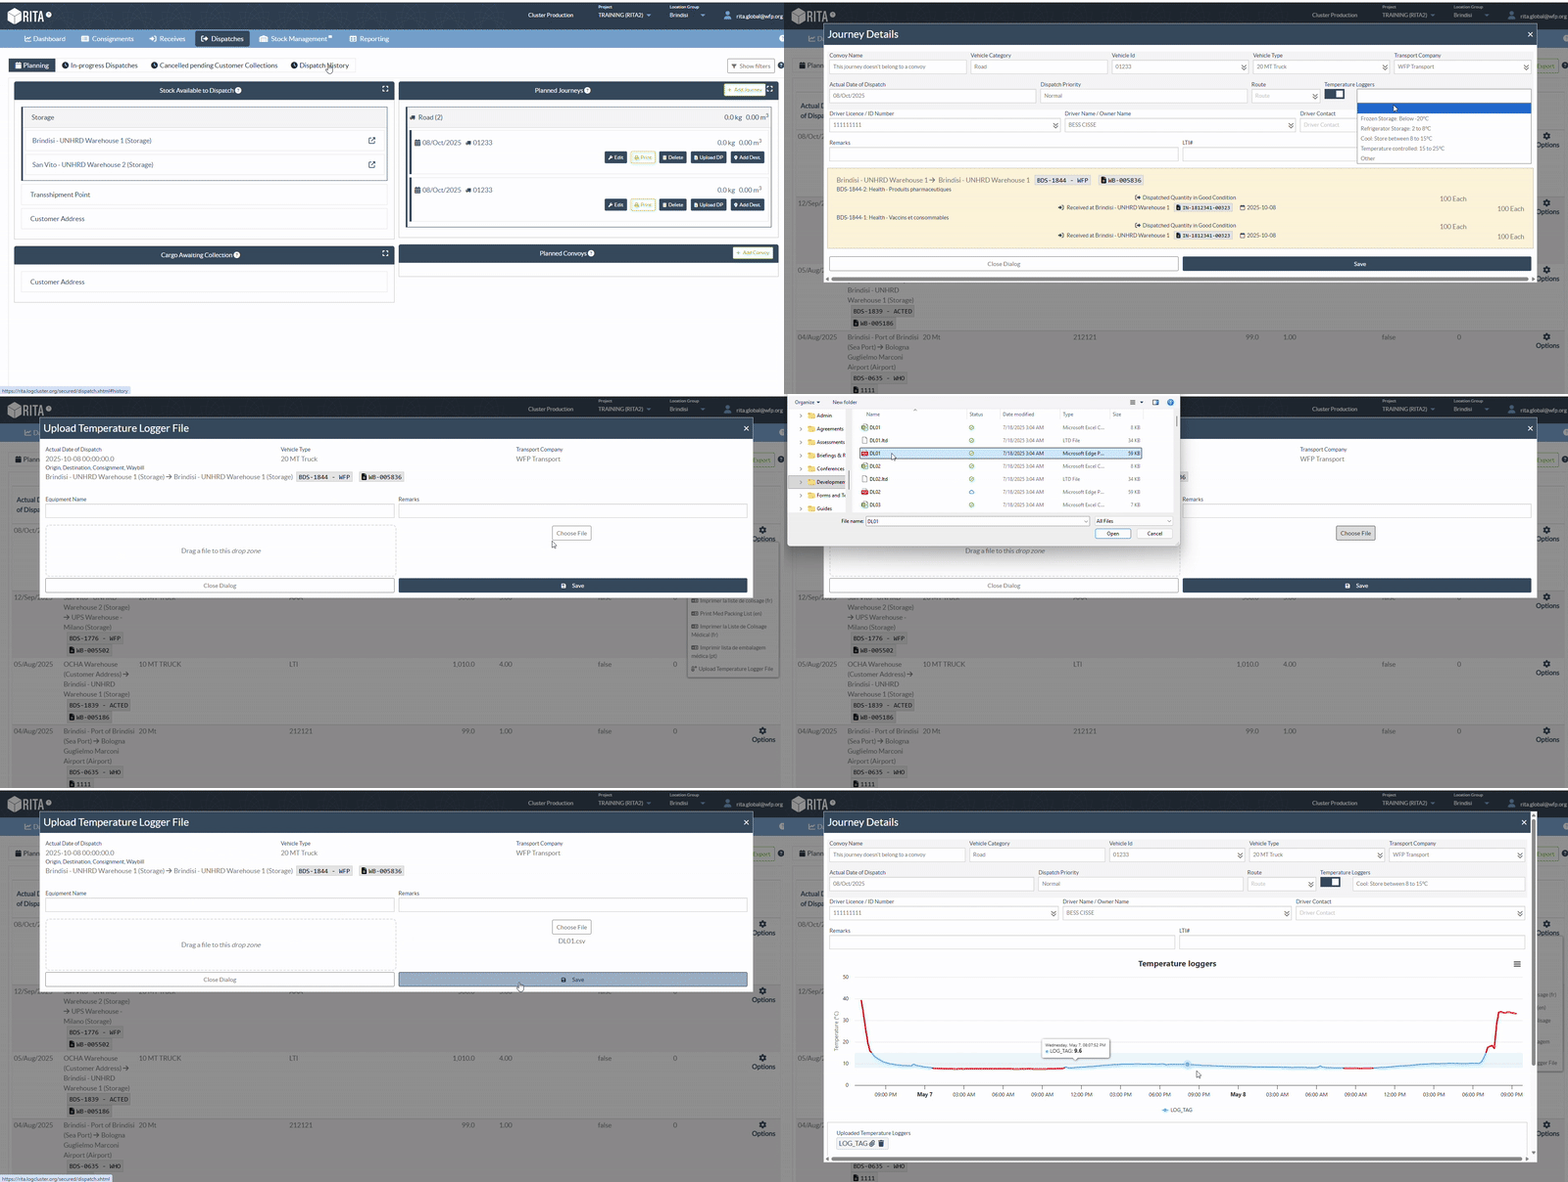
 | The same “Upload Temperature Logger File” function is also available under the “In-Progress Dispatches” tab, allowing operators to upload logger data before the dispatch is fully completed. |
The Dispatch History view includes columns related to Temperature Loggers. Users can review temperature logger data (including anomalies and uploaded files) directly from this screen. These fields are also included when exporting dispatch data, allowing for detailed monitoring and reporting of temperature-controlled shipments.
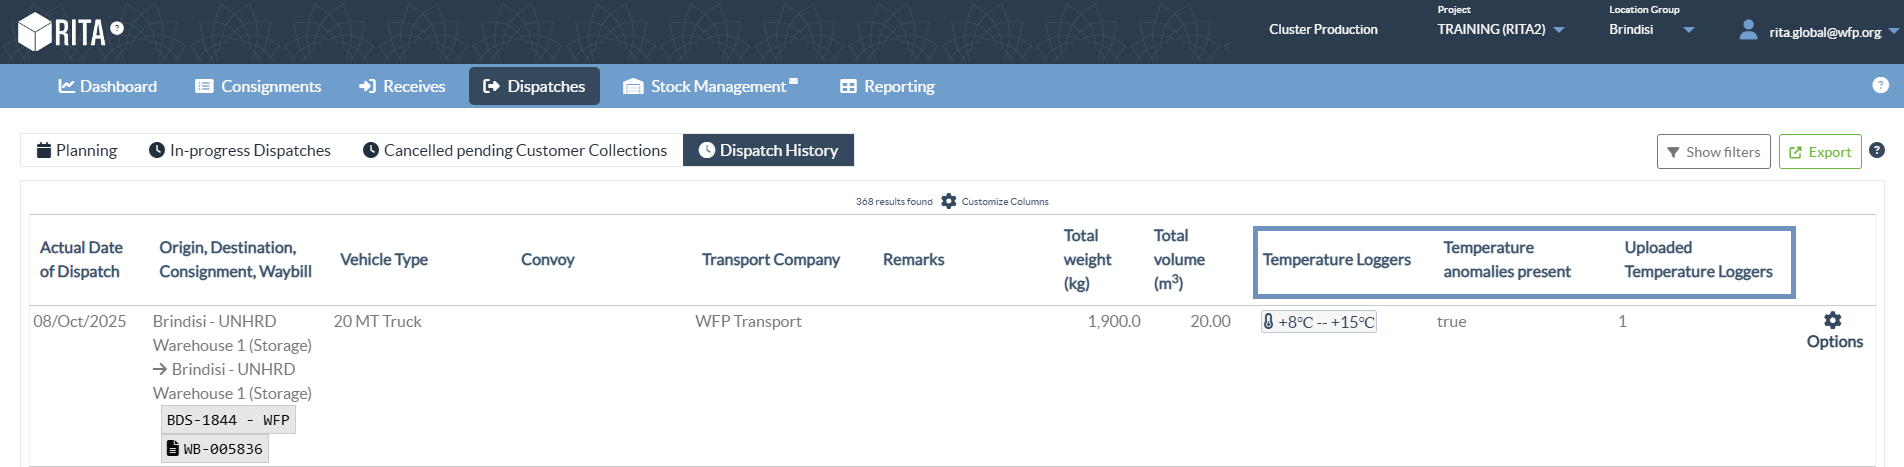
| The "Transport Overview" Report includes additional columns to capture temperature control details for each dispatch. These fields display whether the dispatch was temperature-controlled (true/false) along with the corresponding maximum and minimum recorded temperature values. |
Upload Attachment
RITA operators can upload attachments after the receiving process by selecting the attachment option under “Dispatch History.”
Note: Currently, up to 5 attachments can be uploaded per journey, with a maximum file size of 20 MB per attachment. Only image and PDF files are supported
Step 1: Go to the "Dispatch History" tab and click on the option “Upload Attachment.”
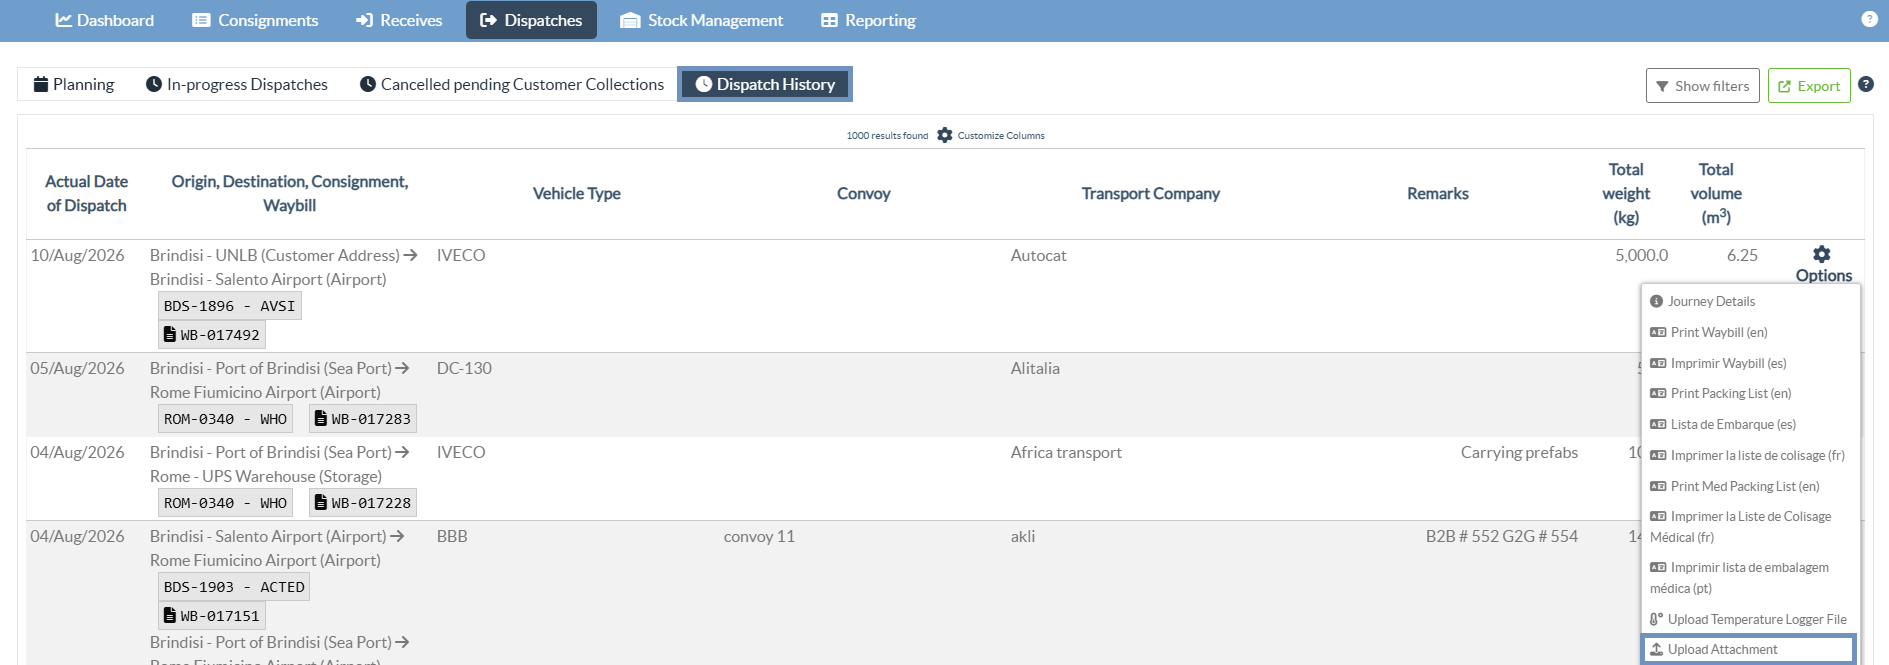
Step 2: Attach the respective document and select the document type. The operator can either click “Add Attachment” or use the drag-and-drop feature to upload the file directly into the drop zone.
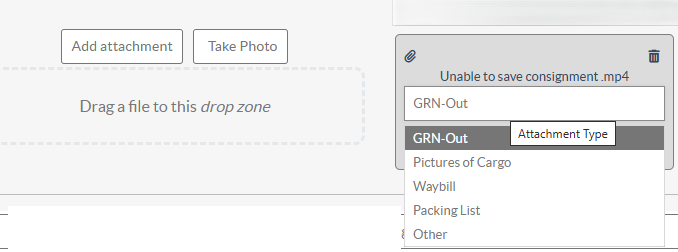
Step 3: Click “Save.”
Once saved, the attachment will stay associated with that specific journey throughout all its subsequent activities.
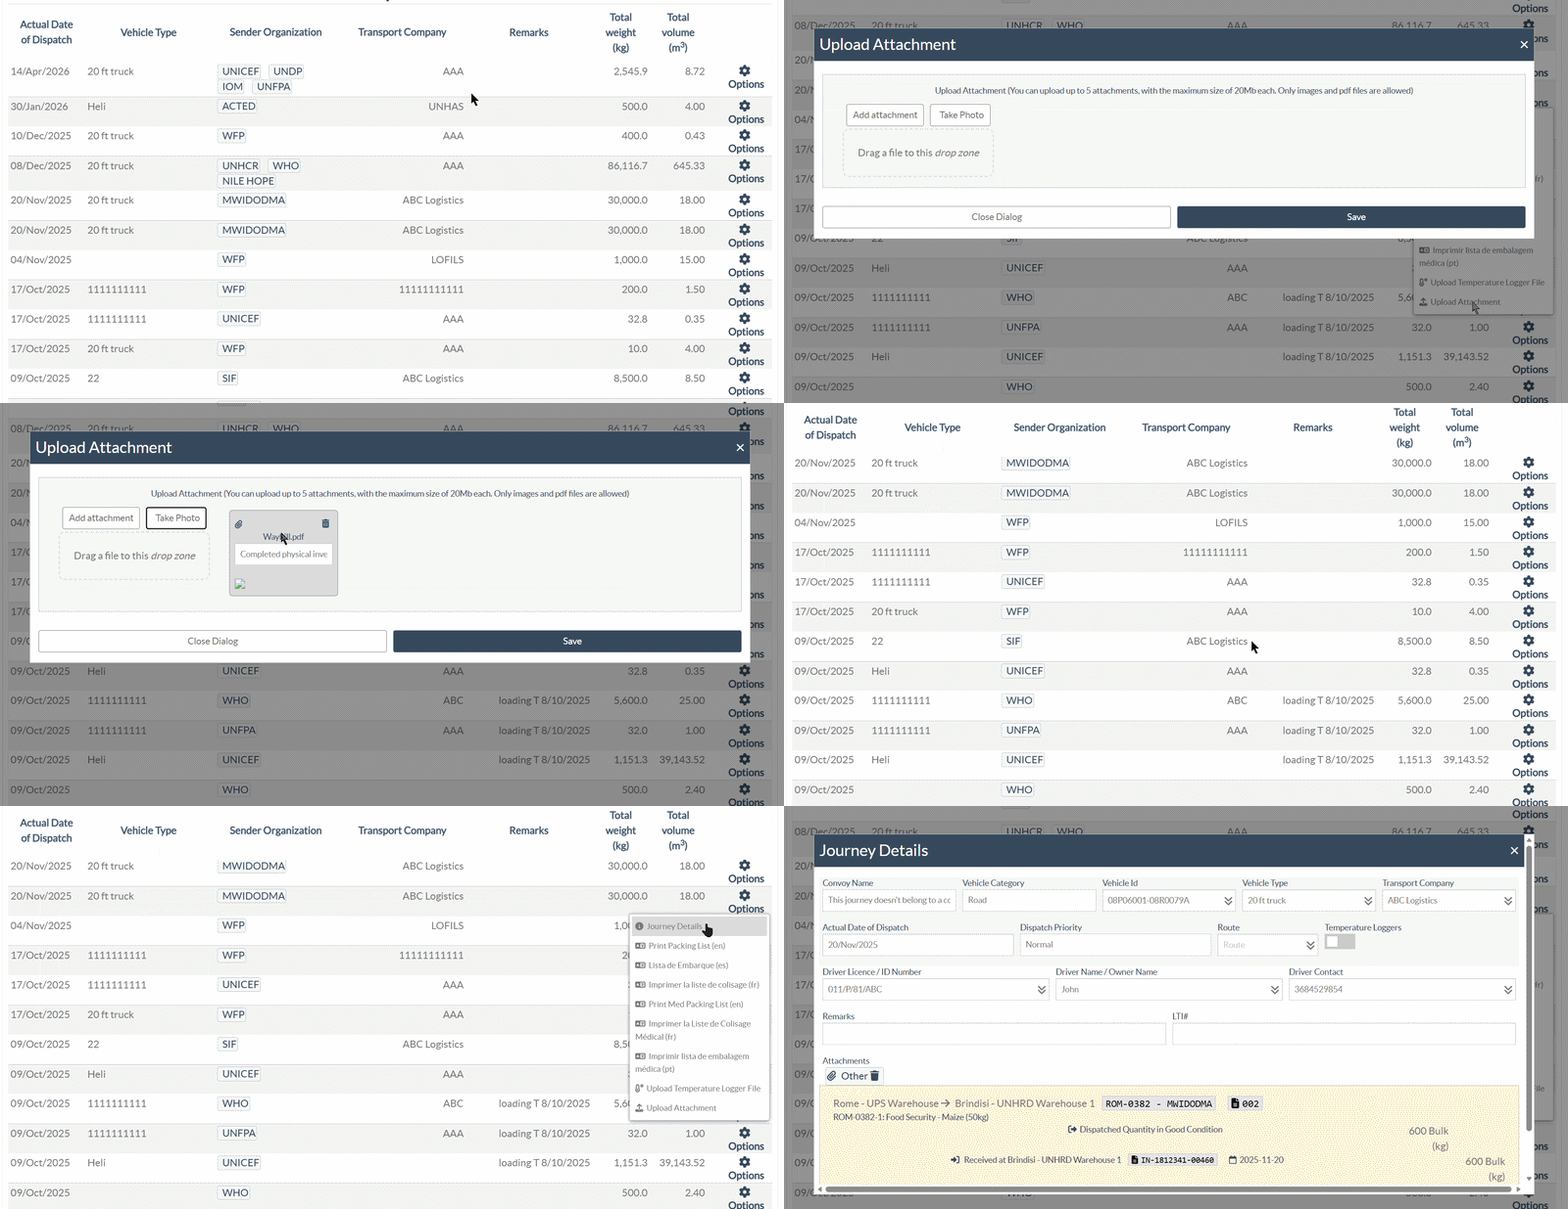
GIF on how to attach file is shared below:
Step 4:Mobile Camera Upload:
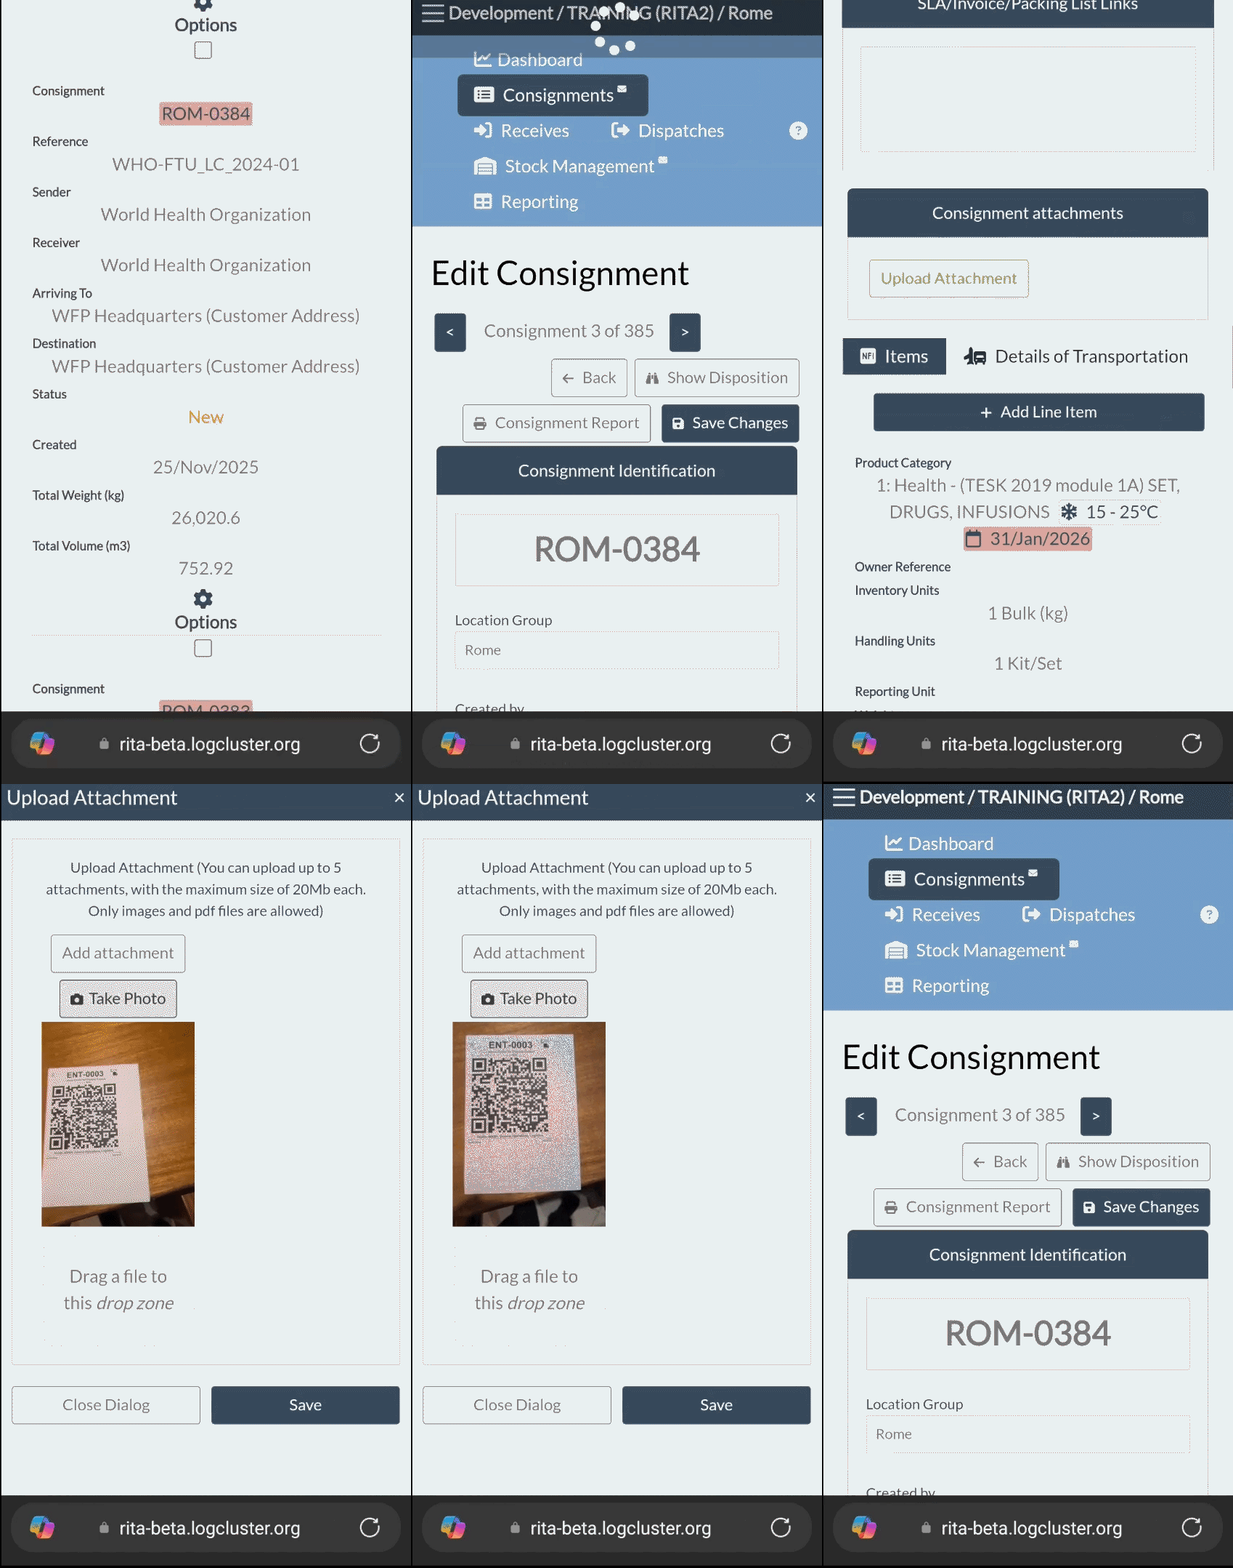
The attachment upload function also supports integrated photo capture. Using the RITA mobile interface, users can take photos of cargo or scan completed documents and upload them directly as attachments.
GIF shared below:
Step 5: RITA operators can view the attached documents by selecting “Attachments” as an option.
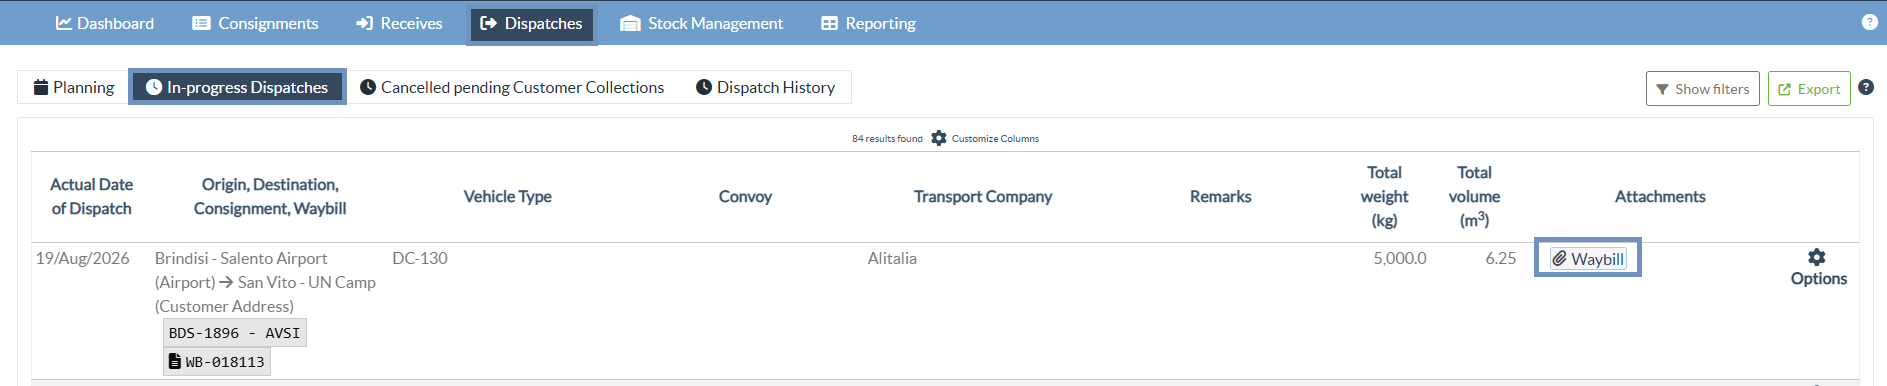
To view the Attachments, users must ensure that the “Attachment” option is enabled under "Customized Columns".