
The “Planned Convoys” feature is designed to enhance coordination and management of multiple journeys moving under a single convoy. This section allows operators to group several journeys into one unified Convoy Plan, facilitating bulk dispatching, tracking, and receiving. Convoys are typically created when multiple vehicles with multiple consignments are moving toward the same destination or through a common route.
This chapter explains how to plan, dispatch and receive full convoys using a built-in convoy planner tool.

Add Convoy:
Operators can define convoy-level details such as convoy name, origin and destination points, estimated departure date, and remarks. Each convoy can include multiple journeys, each assigned to individual vehicles carrying different consignments.
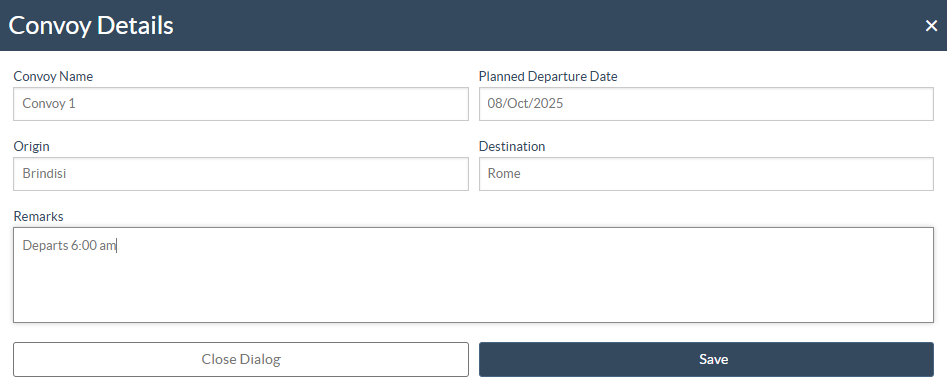
After clicking on “Add Convoy”, the operator will be required to provide the following key details about the convoy and save the convoy.
- Convoy Name
- Origin and Destination Location name
- Expected Departure Date
- Remarks or Special Instruction
Assign a Journey to a Planned Convoy:
Once the new convoy is created, journeys can be assigned to the planned convoy as follows:
Step 1: Within the Planning tab, ensure that your convoy is already created under the Planned Convoy section.

Step 2: In the Planned Journey section, select the journey that you wish to assign to the convoy.
Step 3: Click on the “Convoy Name” option. List will appear showing the available convoys as well as option
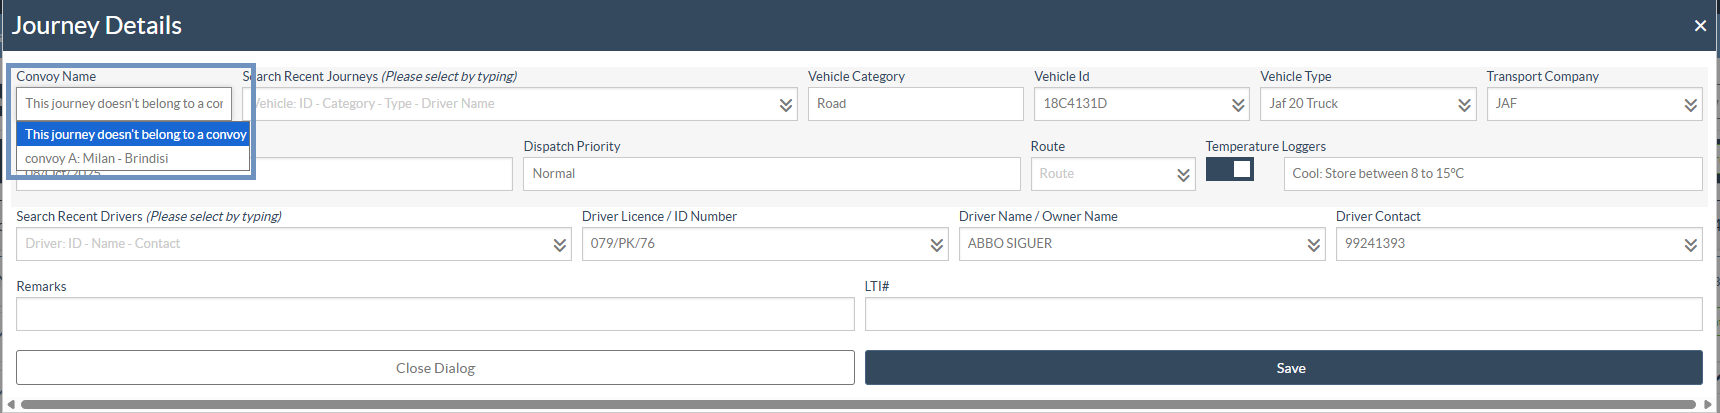
Step 4: From the list, choose the desired convoy to which you want to assign the journey, and then click on “Save.”
Step 5: The selected journey will now appear under the chosen convoy. This feature allows multiple journeys to be grouped under one convoy.
Assign a Waybill to a Convoy:
Once the convoy or individual journey is ready for dispatch, the operator can assign a manual waybill through the "Dispatch" dialog box. This allows for customized waybill numbering when automatic generation is not preferred.
Step 1: Click on the “Dispatch” button next to the convoy or individual journey that needs to be dispatched. The Dispatch Goods dialog box will appear.
Step 2: Under the Waybill Type dropdown, select the preferred option for waybill generation. The system provides four options:
- Waybill generated automatically
- Manual waybill, one waybill number for each consignment
- Manual waybill, one waybill number for each destination
- Manual waybill, one waybill number for each destination and receiver
Step 3: Based on the selection, input the required waybill numbers in the respective fields. For example, when selecting Manual waybill, one waybill number for each destination and receiver, the operator must provide a unique waybill number for each receiver at the destination, as shown in the illustration below.
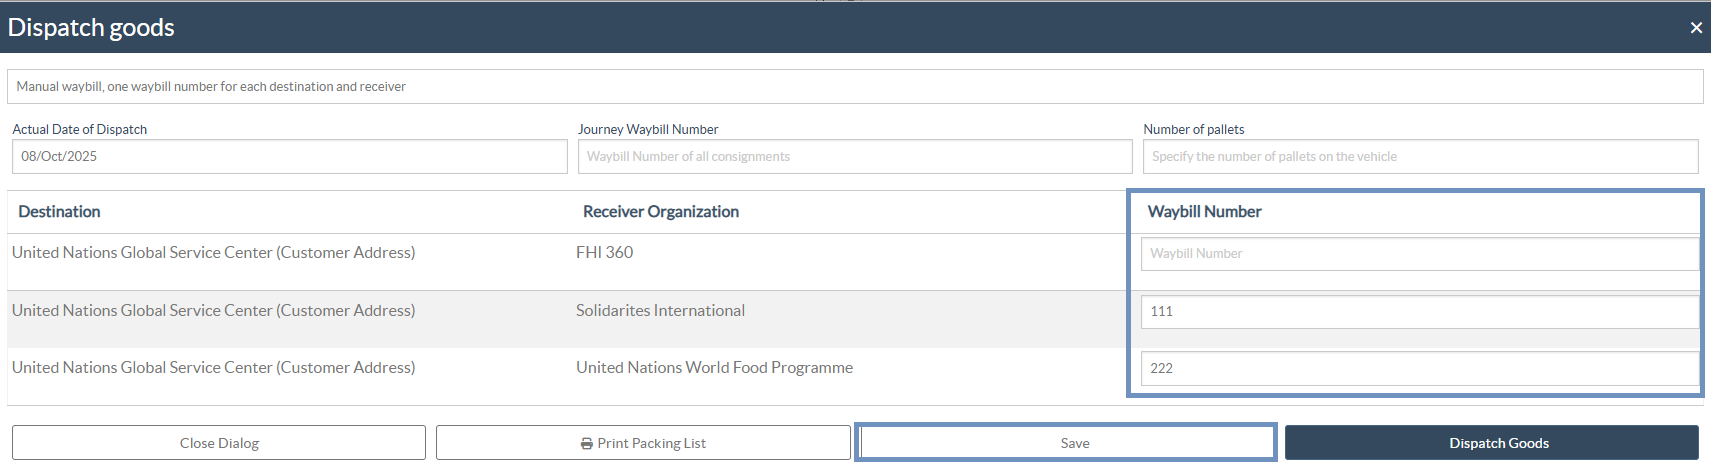
Step 4: Click “Save” to record the waybill information. The assigned waybill numbers will be automatically linked to the convoy and visible in subsequent tracking and reporting modules.
Dispatch Convoy:
Once all the journeys have been assigned and the convoy plan is finalized, the operator can proceed to dispatch the convoy. Convoys can be dispatched either as a whole (all journeys together) or individually by journey, depending on operational needs.
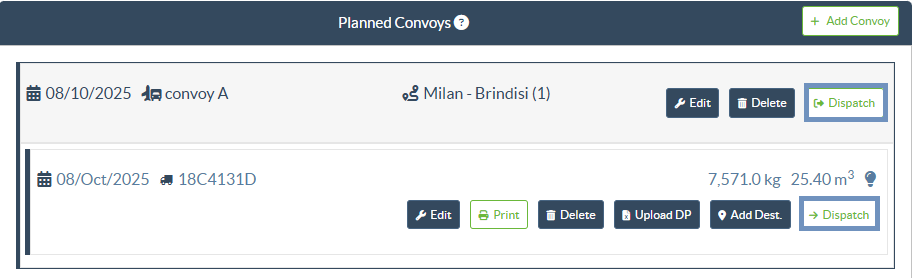
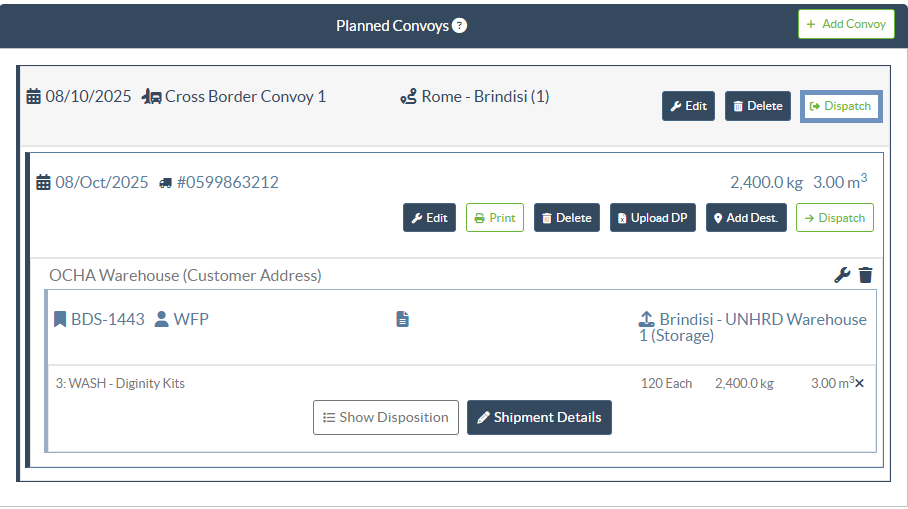
Step 1: Navigate to the Planned Convoys section under the Planning tab. All convoy plans created will appear here, showing convoy name, route, and associated journeys.
Step 2: To dispatch the entire convoy at once, click the “Dispatch” button next to the convoy name. This action will automatically mark all journeys within that convoy as dispatched.
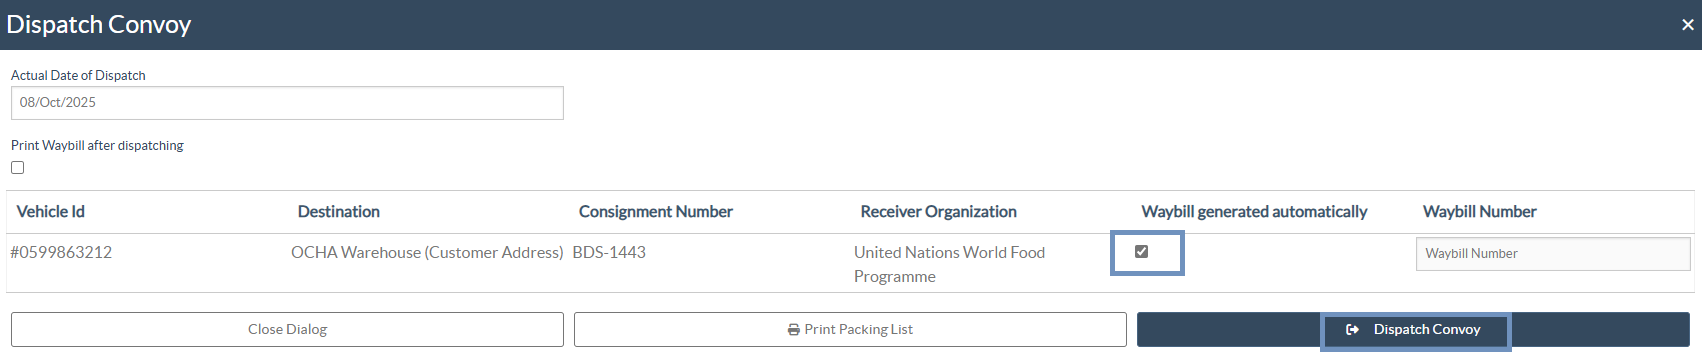
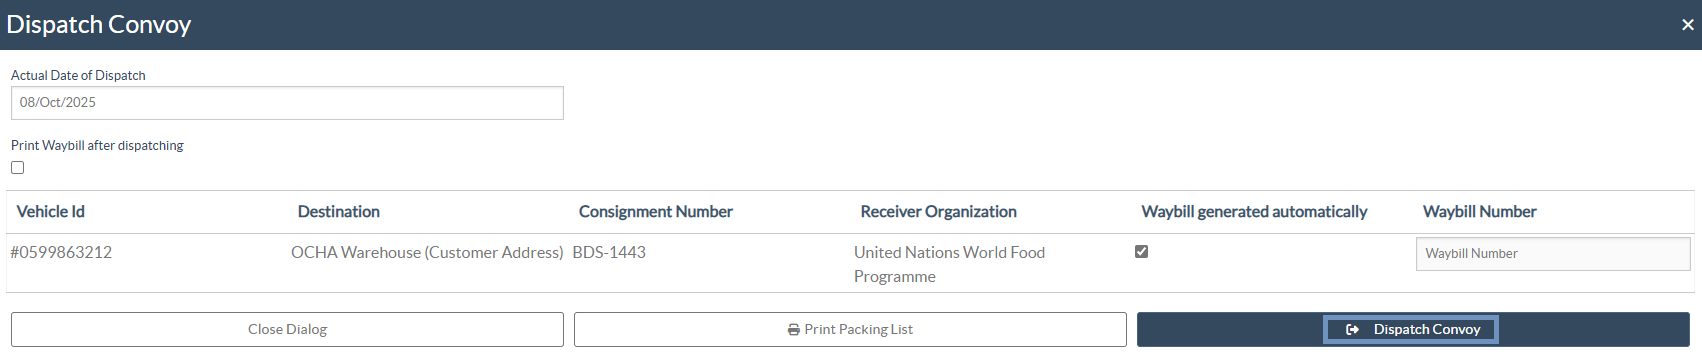
Step 3: Insert the details such as the Actual Date of Dispatch, confirm the Waybill Numbers, and click “Dispatch Goods” to finalize the dispatch.
Note: Even at this stage, the operator can modify any waybill number assigned earlier or select the checkbox “Waybill generated automatically” if they prefer the system to automatically generate waybill numbers before finalizing the dispatch.
Step 3: If only one journey within the convoy is ready for movement, you may dispatch that specific journey separately by clicking the “Dispatch” button next to the journey entry under the convoy.
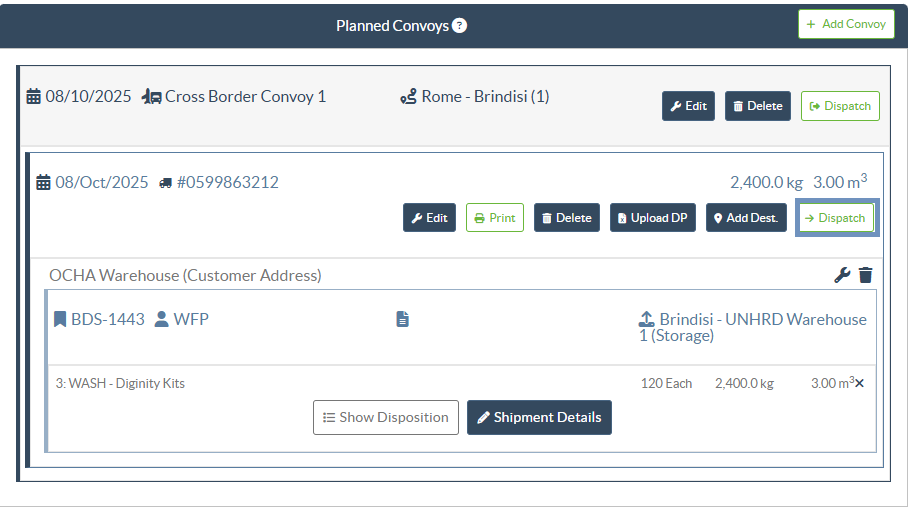
Step 4: Once dispatched, the system will record the dispatch details, including date, weight, and volume, and will make the convoy visible in the In-Progress Dispatches list for tracking and monitoring.
 | The "Dispatch History" and "Partial Dispatch History" tabs include columns related to Convoy, allowing users to review the convoy name. This information is also reflected in the "Transport Overview Report". |
Receive Convoy:
Once a convoy has been dispatched, the receiving location can acknowledge and process the arrival of each journey within the convoy by following the steps listed below:
Step 1: Navigate to the “Receives” tab.
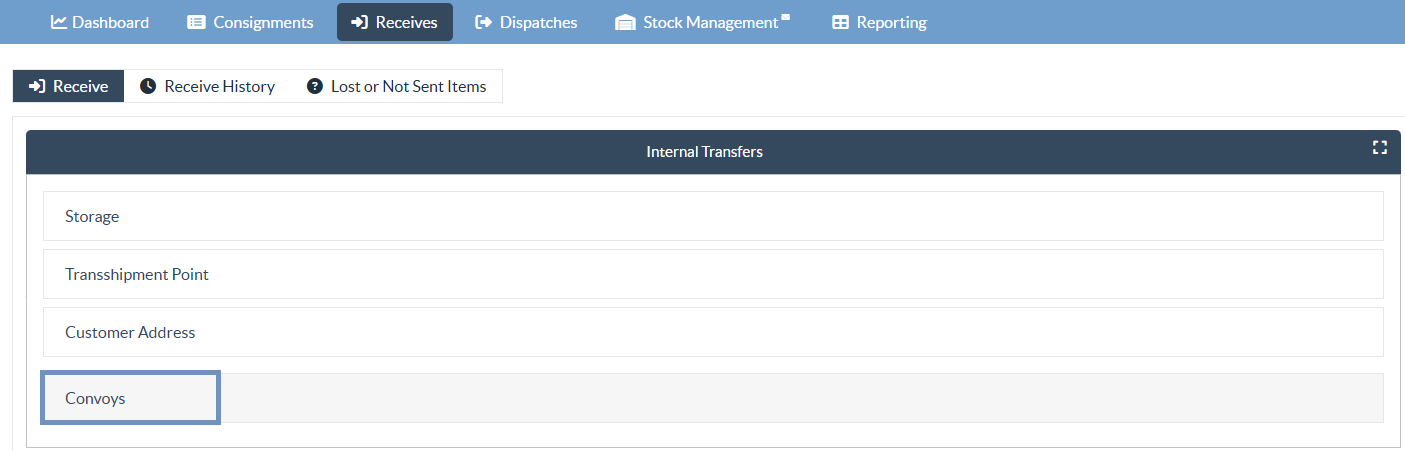
Step 2: Under the Internal Transfers section, select the “Convoy” option. This will display a list of all convoys that have been created and dispatched to the current receiving location.
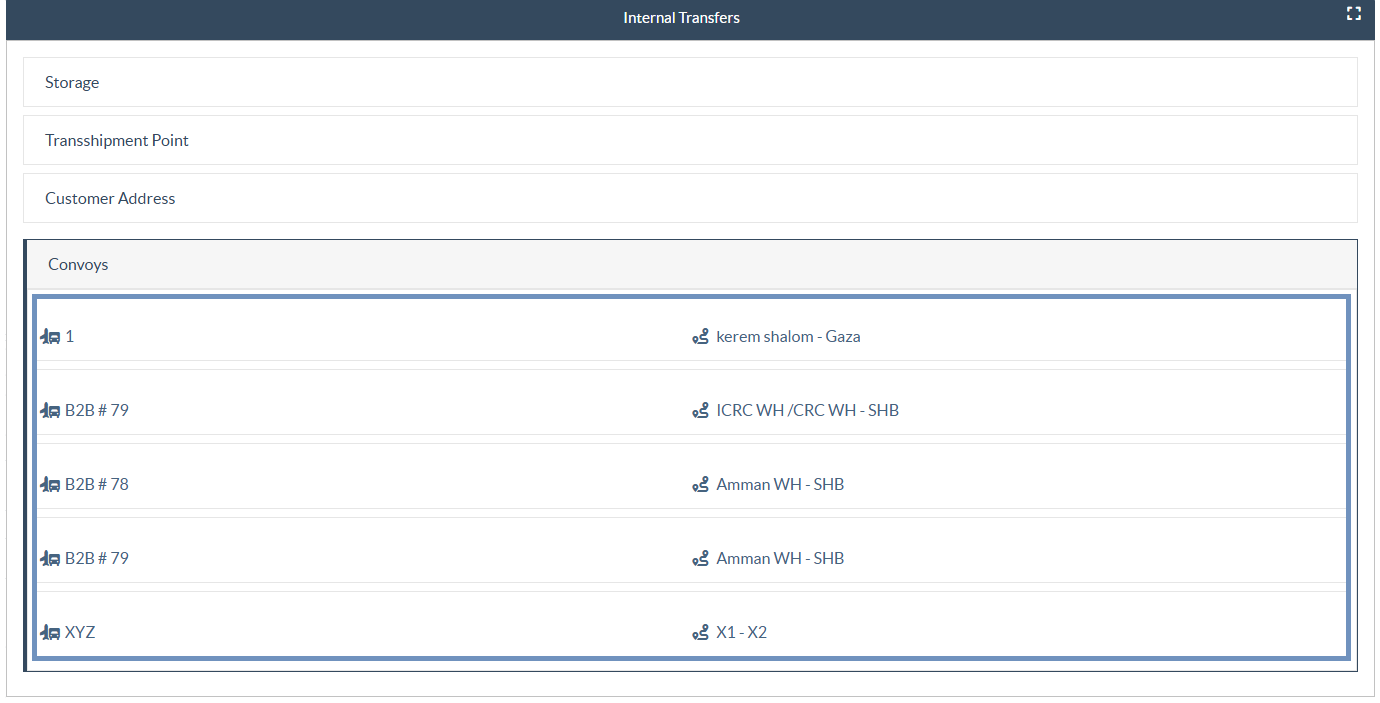
Step 3: Click on “Receive Convoy” next to the convoy to begin the receiving process for that specific journey.

After selecting a convoy from the Internal Transfers list and clicking on “Receive Convoy,” RITA will open the Receive Convoy dialog. This screen displays all journeys associated with the selected convoy, allowing the receiving location to confirm the arrival of each vehicle and the cargo it carries.
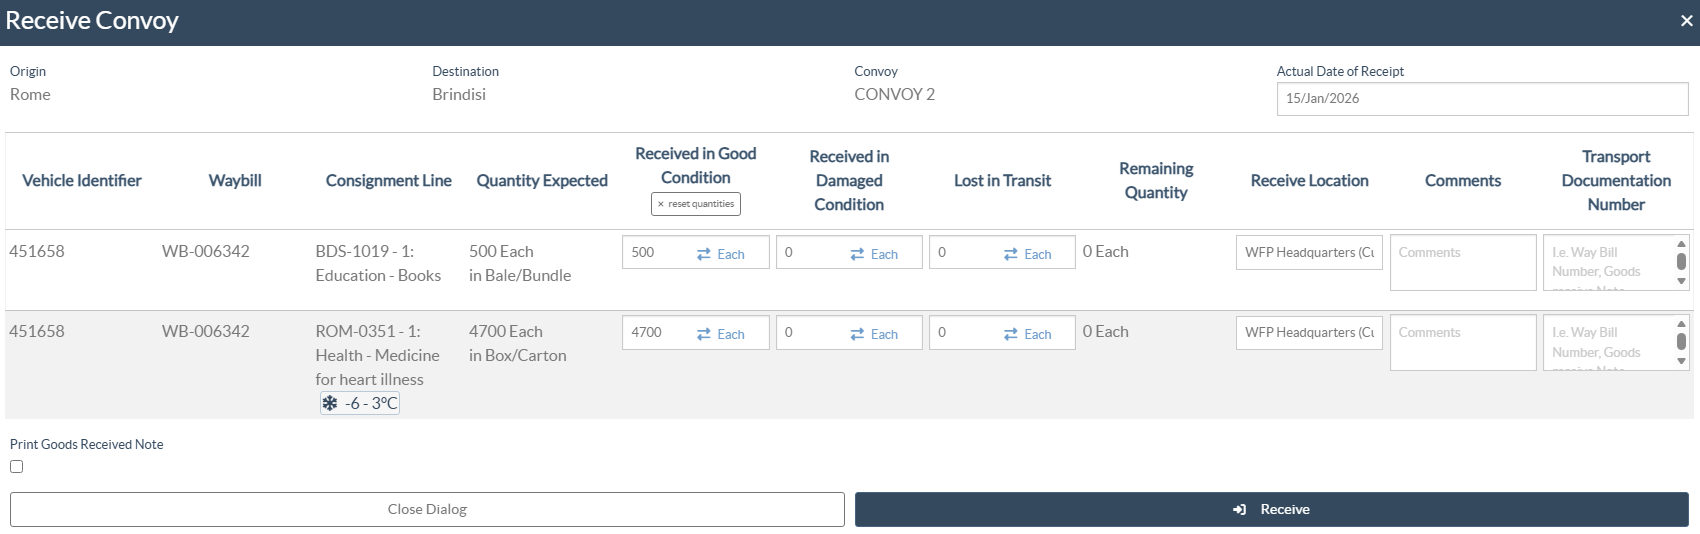
Step 4: Confirm the “Origin” and Destination for the convoy, Convoy Name, and the "Actual Date of Receipt" at the top of the dialog.
Below this section, each row represents consignment line item associated with a vehicle and its corresponding waybill. For each line item, the operator can:
- Review the Vehicle Identifier, Waybill Number, and Consignment Line (item description and packing unit)
- Verify the Quantity expected for each consignment line.
- Record received quantities by entering values under:
- Received in Good Condition
- Received in Damaged Condition
- Lost in Transit - Review the remaining quantity which is automatically calculated based on the values entered.
- Confirm the Receive Location for the cargo which may be different from the convoy destination.
- Enter any Comments related to discrepancies, observations, or notes
- Provide the Transport Documentation Number (e.g., Waybill Number, Goods Received Note Number)
Note: A “Reset Quantities” option is available to clear entered values and re-enter quantities if needed.

Optional: At the bottom of the screen, the operator can choose whether to Print the Goods Received Note.

Step 5: Once all required details have been entered, click “Receive” to complete the convoy receiving process.
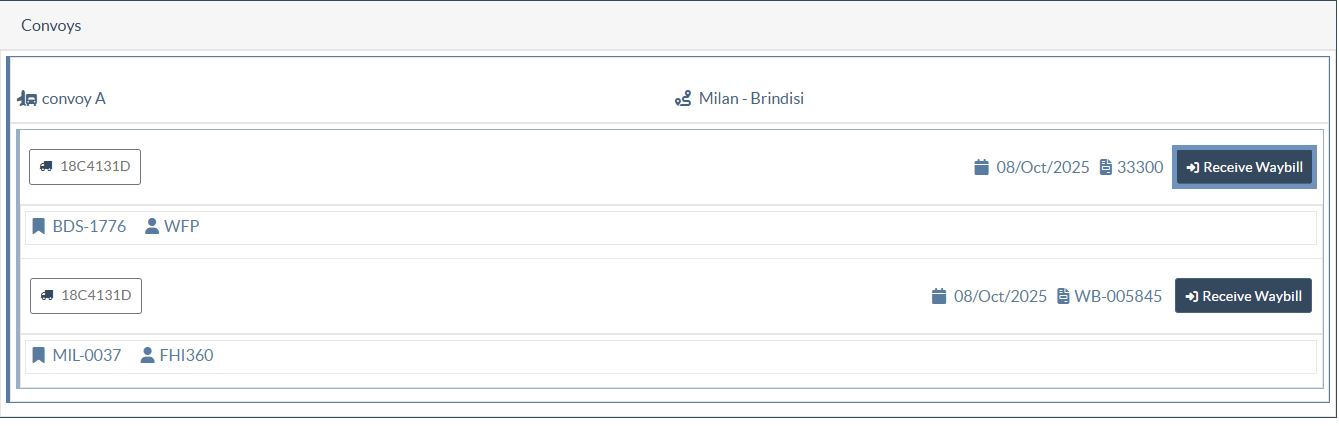
Selective Receive of Vehicle within the convoy:
If users wish to receive journeys individually rather than receiving the entire convoy at once, they can process each journey separately using the selective receive option.
Step 6: Click on “Receive Waybill” next to the corresponding journey within the convoy to receive that specific vehicle and waybill.
The operator can then receive each journey individually at its respective destination by following the same steps and data entry process described in the “Confirming Arrival of Shipment” section of the “Receiving” chapter in this manual. Once completed, the journey will be marked as received in the system.
