
When the operator receives cargo in RITA, partially or in full, the consignments are listed under “Receive History.”
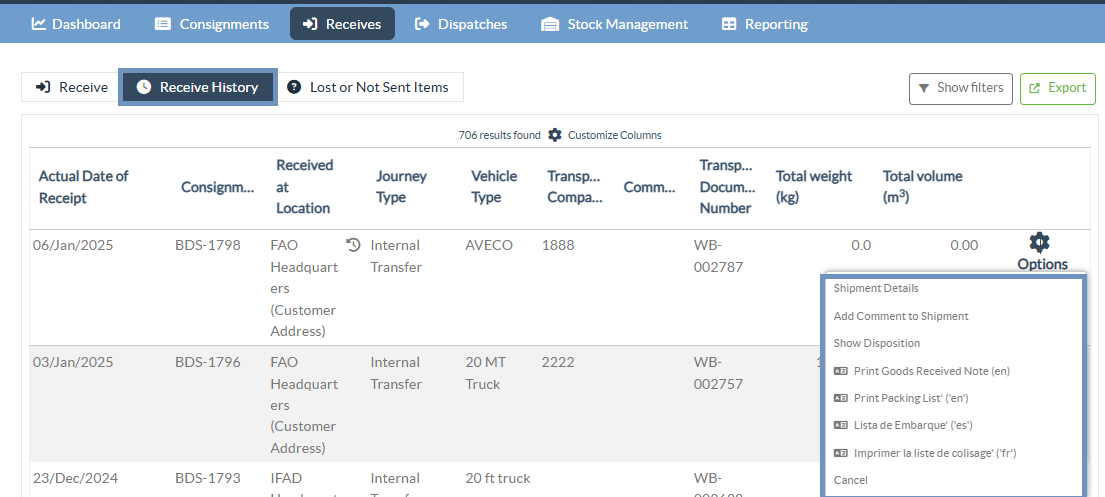
Receive History has the following options:
- Shipment Details
- Add comment to shipment
- Show Disposition
- Pring Goods Received Note
- Print Packing List
- Cancel
Shipment Details
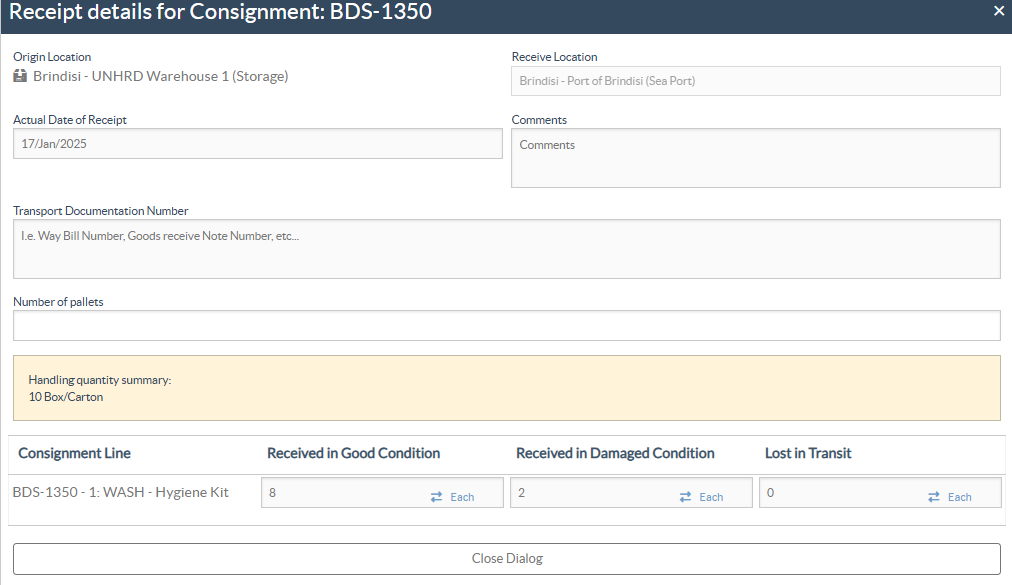
The operators can view the details of the received consignment by selecting the "Shipment Details" option.
Add Comment to Shipment
This option allows users to add any missed comments when receiving the cargo. Updated comments can be found under the "Additional Comments" box in the shipment details.

Show Disposition
Refer to chapter Consignments for the details on show disposition.
Print Goods Received Note
RITA operators can automatically generate goods received notes for the consignment by selecting the option "Print Goods Received Note." For details on the Goods Received Note, refer to the "Receive" page.
Print Packing List:
Refer to the "Print packing Lists and Waybills" section in the chapter "Dispatches."
Cancel Receive
RITA allows the operator to cancel the receipt made in the consignment. By choosing the "Cancel" option in the "Receive History" screen, the selected receipt will be canceled, and the consignment will return to the “Receive” screen awaiting confirmation of receipt from the operator under “Incoming Transfer” or “Customer Deliveries & Transshipments.”
 | Reversals must follow the order in which the consignment was processed. Actions performed later (e.g. Release or Dispatch) must be reversed before earlier actions (e.g. Receive). Therefore, not all received consignments will have the option to cancel. |
Steps to cancel the receipt:
Step 1: Go to the show filter option and filter by the details of the consignment to find the consignment that requires reversal.

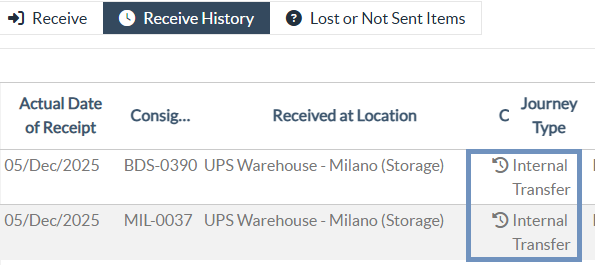
Note: A clock icon displayed next to the Journey Type (e.g. Internal Transfer or Customer Delivery) indicates that the consignment is reversible (cancellable).
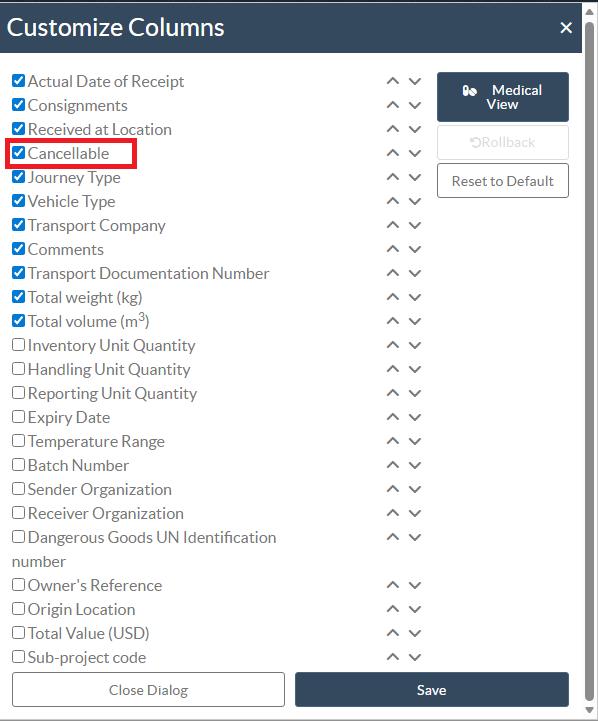
To view the clock icon, users must ensure that the “Cancellable” option is enabled under Customized Columns. If this option is not selected, the clock icon will not be visible, even if the consignment is eligible for reversal.
Step 2: Click on the “Options” icon towards the right end of the consignment the operator wants to reverse.
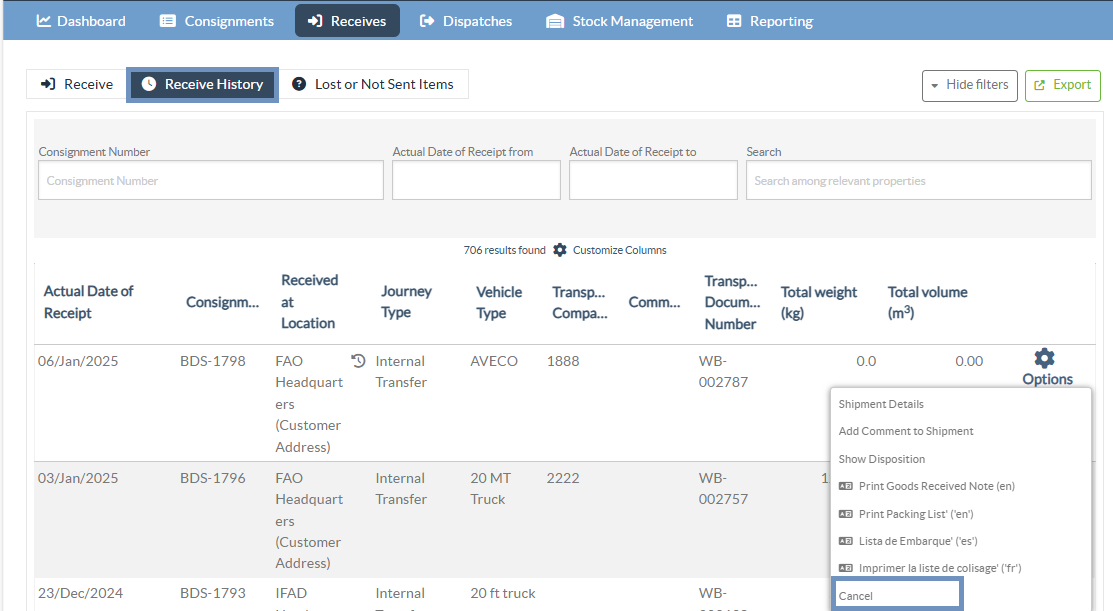
Step 3: A drop-down menu appears. Select “Cancel” to cancel the receipt.
Step 4: From the box, the operator must confirm the details and click “Delete” to confirm the cancellation of receipt for the selected consignment.
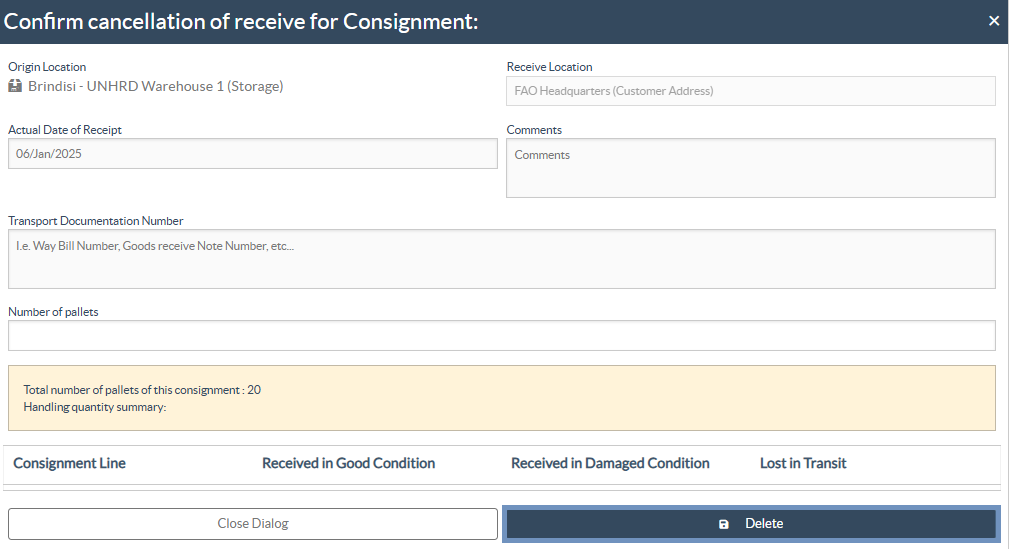
| To reverse or cancel any consignment that comprises Lost or Not Sent Items, the operator must find them under the section “Lost or Not Sent Items” |
