
1. Log On
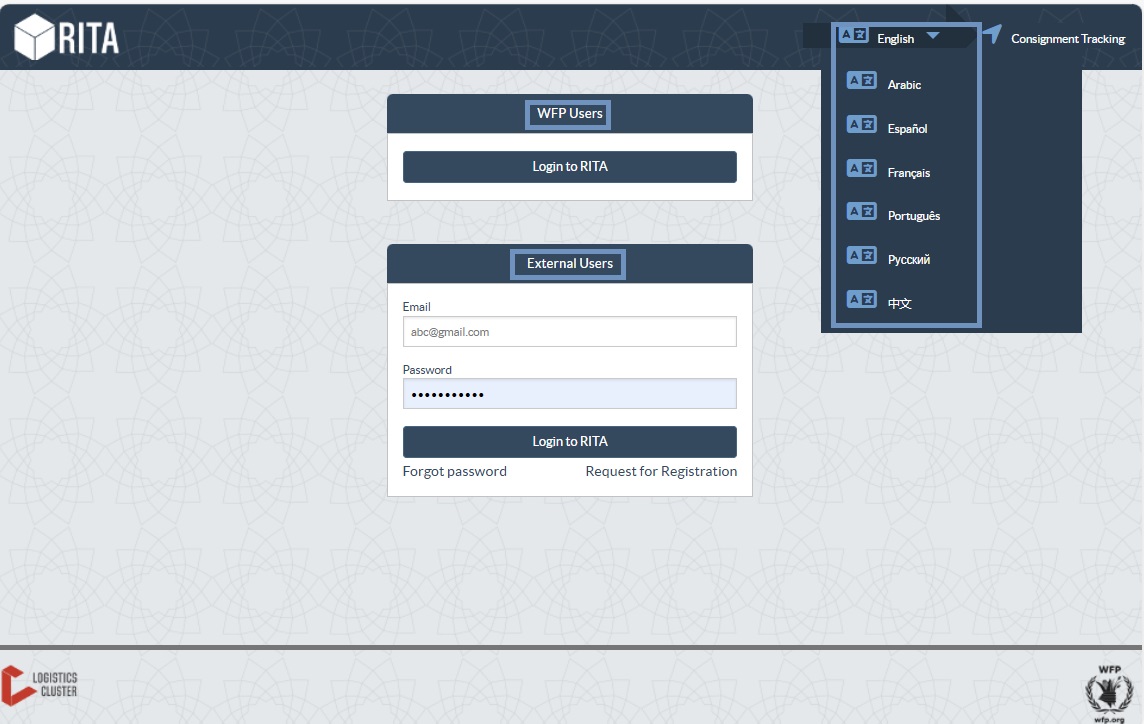
To access RITA, open your web browser (Google Chrome is recommended as the default browser) and enter the appropriate URL (for the Logistics Cluster: https://rita.logcluster.org, for On Demand Service Provision: https://rita.wfp.org).
In the field provided for this purpose:
- For WFP users, press “Login to RITA.”
- For External Users, Insert your email address.
- Insert the password provided to you by RITA GLOBAL.
|
|
2. Create and Manage Consignments
From the RITA Home page, click on “Consignments.”: You have five options for managing consignments at the top right side of the screen:
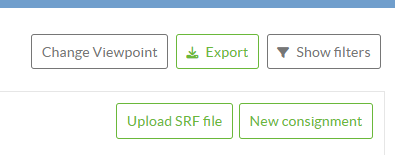
- If you have a saved Service Request Form (SRF), click the "Upload SRF file" button to upload it
- To manually create a new consignment, click the “New Consignment” button
- To edit or view the details of an existing consignment, use the “Show Filter” to search for the shipment.
|
The "Show filters" option is at the top of every RITA screen. It helps you locate consignments by providing search criteria such as consignment number, organization, waybill, created date, or other details.
|
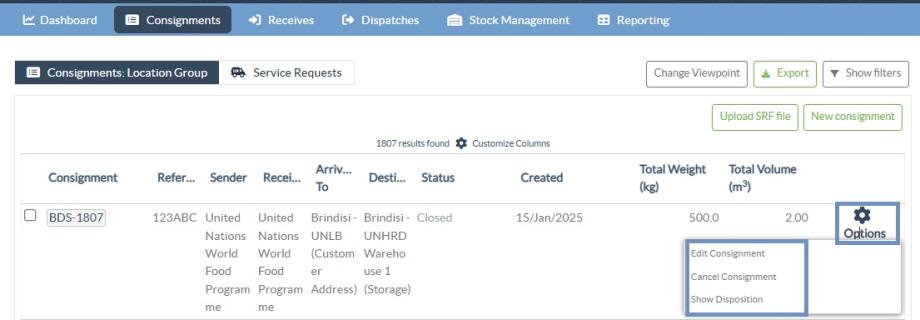
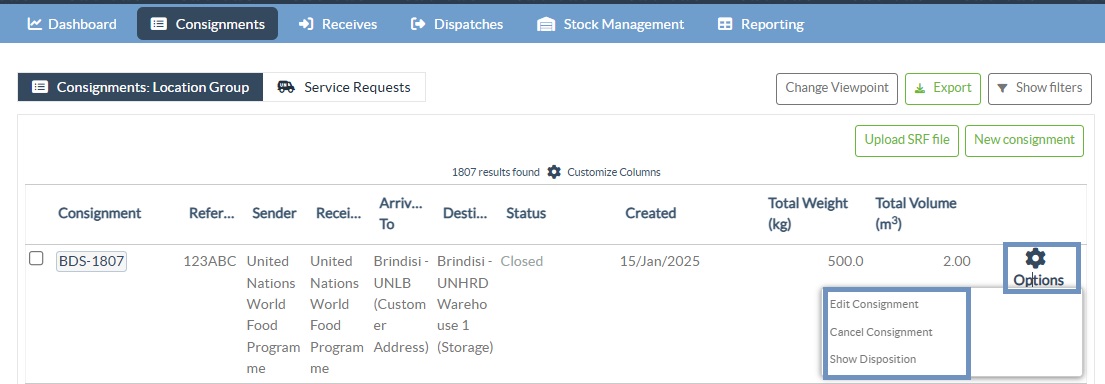
You can also use the “Export” button to sort and search. Once you find the consignments you want, click on the “Edit Consignment” option to view or edit the details.
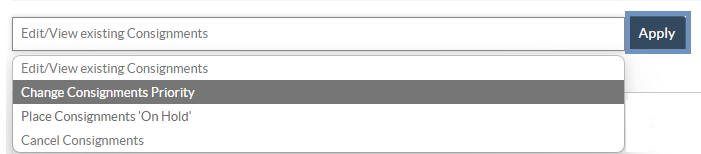
If you need to work on multiple consignments, you can mark all the consignments you want to work on within the Consignment List. After selecting, you will have four options: to edit/view the consignment, change consignment priority, place the consignment on hold, or cancel consignments.
Select the appropriate option for multiple consignments and click the "Apply" button.
|
The consignment screen initially shows only those created for that project and location group. To see the consignment details created at other location groups, users must change their site location using the “Change Viewpoint”.
|
Incoming Online Service Request:
You will receive a notification for all online requests in the "Service Request" tab at the top. Only requests with “Verified” status are valid. Click on “Options.”
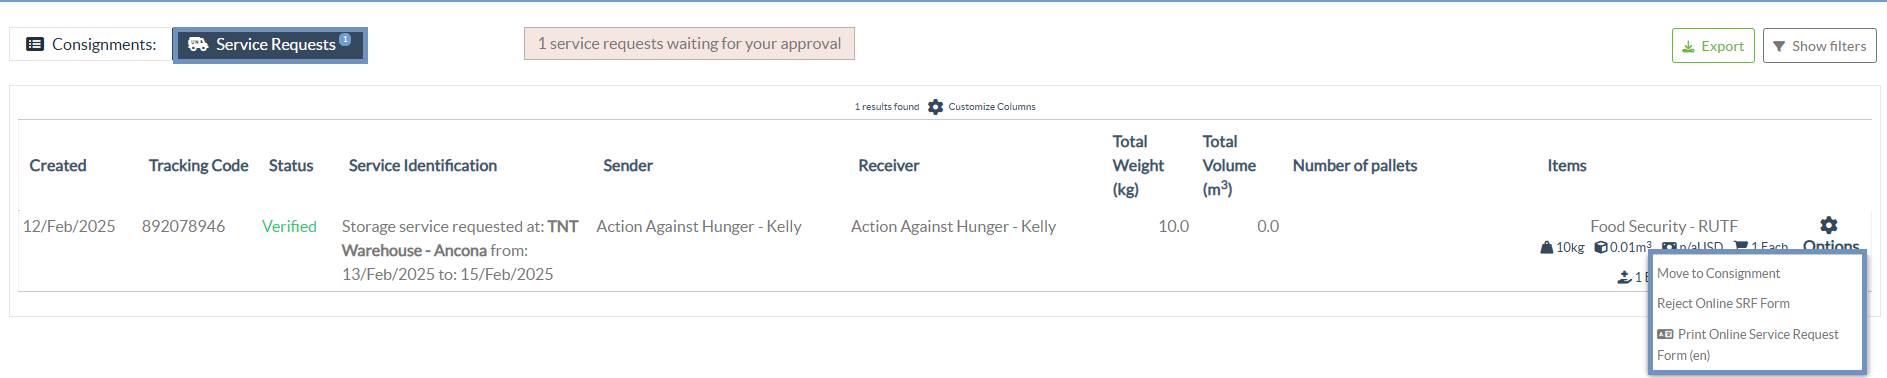
Option 1: Move to Consignment: This option will take the operator to the Consignment screen. Operators must verify all information as listed in paragraph 2.3 below and click on the status “Accept” to create a new consignment.
Option 2: Reject Online SRF: The operator can reject the SRF by explaining why the request cannot be accepted.
Option 3: Print Online Service Request Form: The operator can print the online SRF
|
Online service requests pending partner verification will appear as "Pending" and cannot be approved. Customers must validate requests by clicking on the link shared with them via email.
|
Once the SRF is uploaded in the system (either manually or online), you must check the following:
Sender/Receiver Organization: Verify the sender and receiver organization.
Sender/Receiver contact: Use the “+” sign on the right-hand side of the box to add the contact details, if not added automatically.
Starting Point: You can select from the three options listed:
- Select "Collect from Customer's Address" for pickup from the Partner's/Customer's address.
- Choose "Transshipment into Port" for temporary storage at the port or terminal
- Select "Customer Delivery/Warehouse Pickup" for customer pickup or delivery to the warehouse.
Service Identification:
- Select "Cargo is to be transferred and delivered to the customer's address" for transport service from starting point to destination.
- Choose "Cargo is to be transferred and collected by the customer" for transport to a certain point and release to the customer.
- Select "Cargo is to be stored" for storing at the warehouse.
 |
|
System Icons: RITA enables users to see the display of new system icons if items are Dangerous, Temperature controlled, Fragile, or Regulated in the consignment and will follow items throughout their movements within RITA.
Item Details: Verify the product category, name, units of measurement, volume, weight and value and “Save”. Use the option “Edit consignment” to make any changes.
|
You cannot edit the item details once the consignment is “In Progress”.
|
3. Receive Deliveries of Cargo Into a Warehouse
From the RITA Home Page, click “Receives.” The Receive screen displays all the cargo that has been accepted and has physically arrived on site toward stock on hand.
RITA distinguishes between two types of cargo deliveries:
- When the customer delivers the cargo to us directly from their location, it enters the RITA system for the first time. Therefore, we usually don’t know the composition of the vehicle load. Such consignments are listed under the heading “Customer Deliveries,” listed by the Heading location name order.
- When the cargo arrives from another site tracked by RITA, we know the vehicle load composition and the transporter details. The composition of a vehicle load is determined as part of the Dispatch process. Such consignments are listed under “Internal Transfers.” listed by Destination and by Journey (Vehicle ID, date and waybill number)
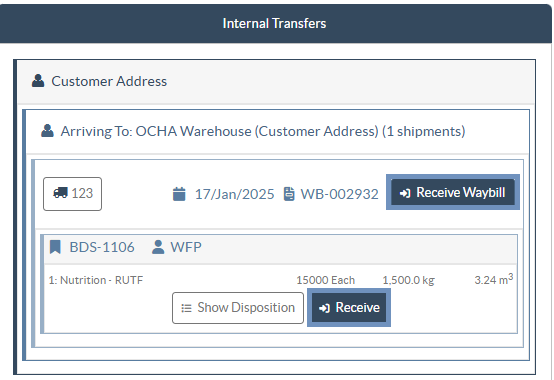
- Select the location where the consignment is to be received.
- If you have the journey waybill number, you can receive multiple consignments during the journey. Click on the "Receive Waybill" button.
- For any other type of delivery, click on the “Receive” button to receive per consignment.
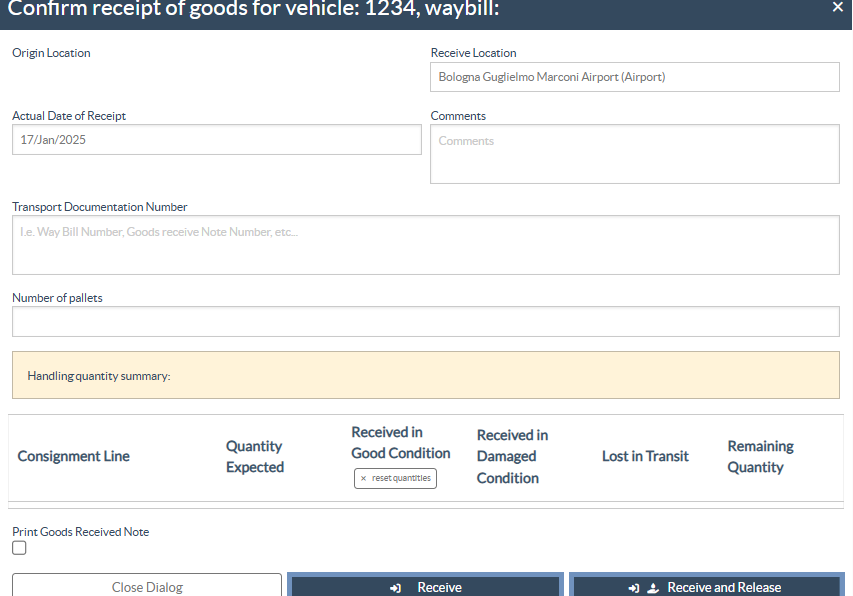
- Input quantity “Received in good condition”.
- Input quantity “Received in damaged condition” (if any).
- Input quantity “Lost in transit” (if any)
- Click on the “Receive” button to confirm the receipt of goods.
- For the consignments listed under "Internal Transfer," the operators have the option to receive and release them to the final customer at once. Click on Receive and Release.
|
Print Goods Received Note: RITA operators can automatically generate goods received notes for the consignment by selecting the checkbox "Print Goods Received Note” when confirming receipt.
|
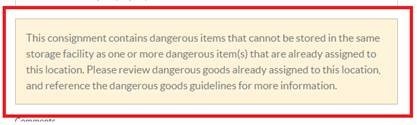
Dangerous Goods warnings for storage and transport:
RITA will alert the operators managing storage/transport of possible harmful or dangerous chemical interactions based on the DG UNID number specified.
| Dangerous goods in Transport | Dangerous Goods In Storage |
|---|---|
| 
|
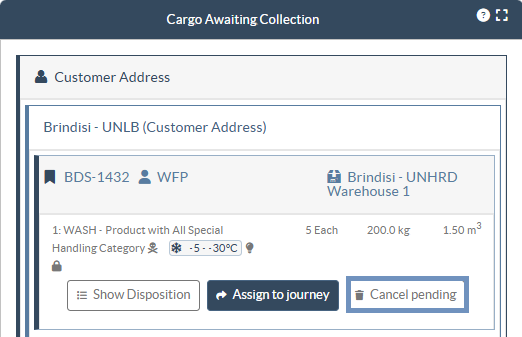
Cancel Pending Cargo: RITA distinguishes between two types of cancellation of pending cargo:
When the customer requests us to cancel the pending cargo to be collected from the customer's address
- Go to the “Cargo Awaiting Collection” box under the “Dispatches” screen.
- Click on the consignment; within the box, select “Cancel Pending.”
- Explain the reason for cancellation and click “Save.”
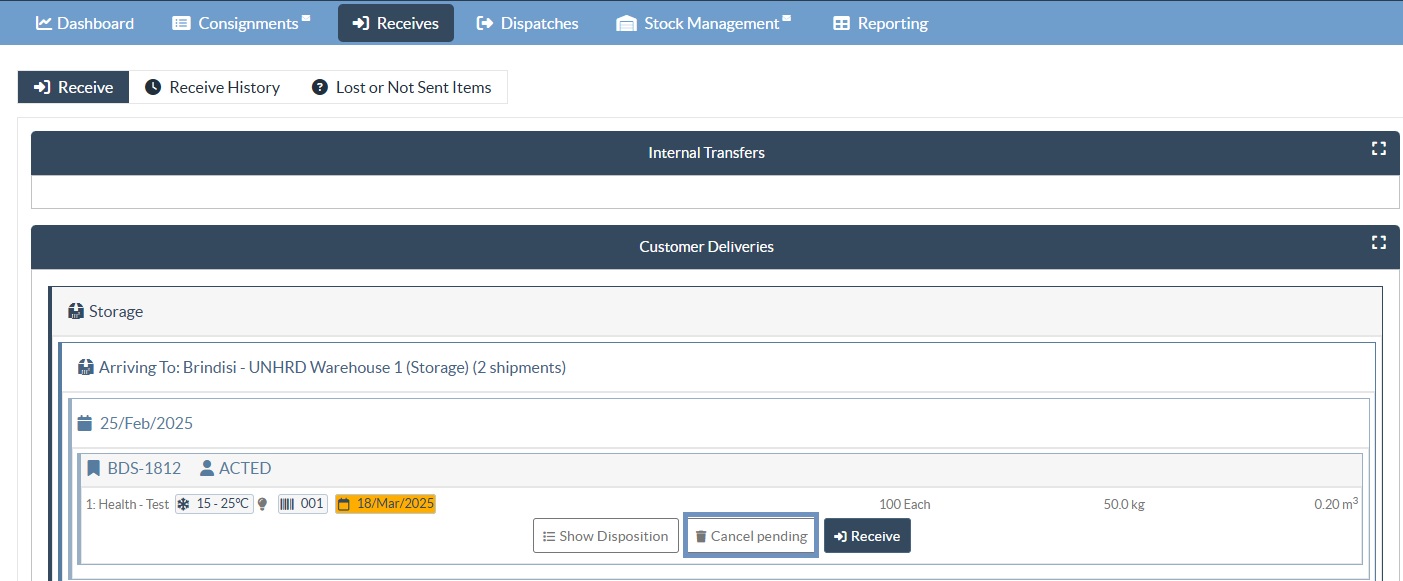
When the customer requests us to cancel the pending cargo to be delivered by the customer.
- Go to the Customer Deliveries box under the “Receive” screen.
- Usually, the consignment is listed under Storage or Transshipment Point; you can use the filter option to find the consignment.
- Click on “Cancel Pending”
- Provide reason for cancellation and click “Save.”
| Cargo to be collected from the customer's address | Cargo to be delivered by the customer. |
|---|---|
| 
|
|
"Collect from Customer address” is another method for receiving cargo into RITA. This option requires dispatching vehicle to collect the cargo and is found under “Dispatches” screen
|
4. Collect Cargo from a Customer’s Warehouse/Supplier
From the RITA Main menu, click “Dispatches”.
| Each time you transport consignment (s) by any mode, you must create a new journey in the “Planned Journeys” section.
|
To create new Journey, click on “Add Journey”
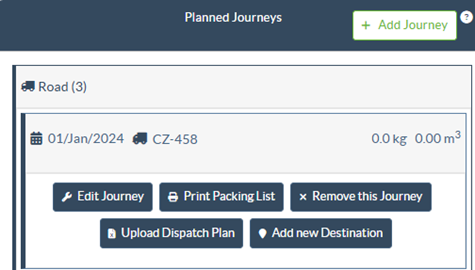
The "Journey Details" window will appear; you must fill in all the required fields. This step is crucial when planning a dispatch or a collection. Depending on the type of service requested for the consignment, the system will either create a new journey for a specific vehicle, add a new dispatch destination to an existing journey, or override the dispatch destination recorded in the consignment's Service Identification section.
|
Under the planned journey section, the packing list does not show the details and is usually blank until the consignment has been added to the journey.
|
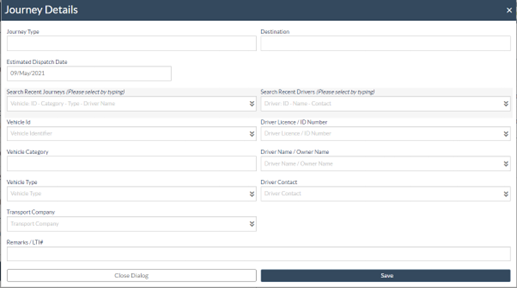
Please include the following details:
Destination, Type of journey, Dispatch priority, Driver's name, ID and contact number, Vehicle type, Vehicle ID, Transport company, Remarks, and LTI# if available.
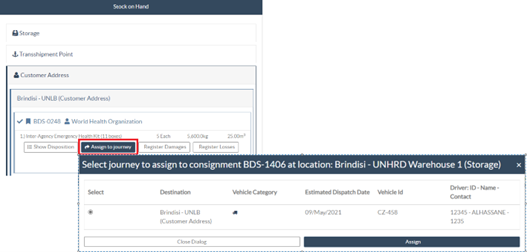
Add a Consignment to Planned Journeys:
Once the new journey is created, we add a consignment to the planned journey as follows:
- (If required) Filter the consignment number that will be added to the planned journey using “Show Filter”
- Within the consignment box, click on the “Assign to Journey” option:
- Select the journey cargo to be assigned and click “Assign".
- Update the dispatch quantity and click "Save".
Click on the journey type (Fixed Wing/Road/Sea/Pack Animals, etc.), select the consignment that needs to be transported, and click “Dispatch Goods.”
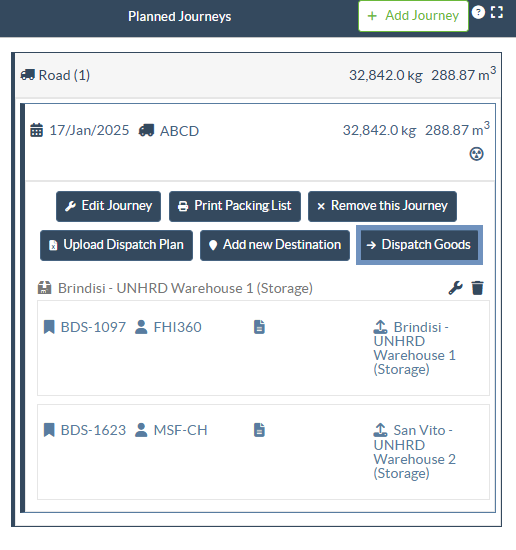
- Much like packing lists, users can automatically print the waybills from RITA as well. The need for waybills is dependent on needs of the operation on the ground, but all shipments can generate waybills at the point of dispatching cargo.
- Manually enter the waybill number by selecting the option “Waybill generated manually” or select “Waybill generated automatically” and click "Print Waybill after dispatching" to print the waybill from RITA. automatically
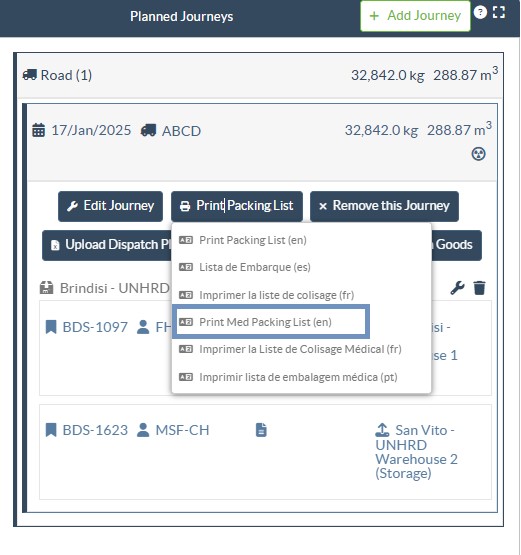
- Users can automatically print the packing list from RITA.
- RITA enables the users to print “medical packing list” specifically designed for medical items
|
Number of Pallets: RITA operator can specify the number of pallets loaded on the vehicle added to the journey.
|
5. Release Cargo to the Customer
- From the RITA Main Menu, click “Stock Management.”
- For Release orders received manually in Excel Form, click on “Planning.”
- For online release forms, click on “Release Orders.” you have three options:
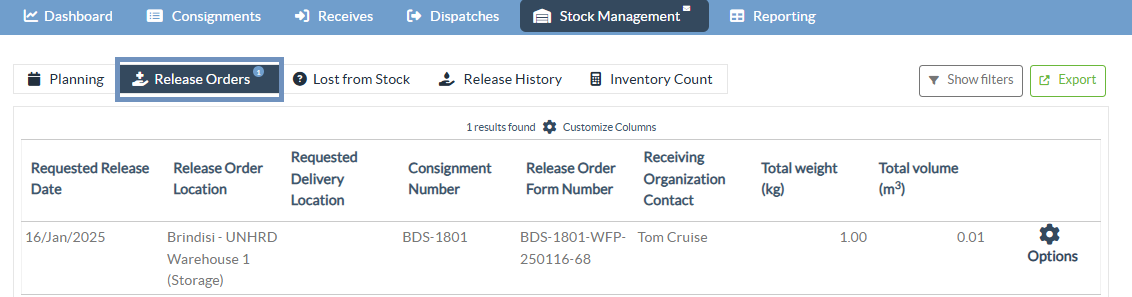
- Reject release order.
- Print the release order form.
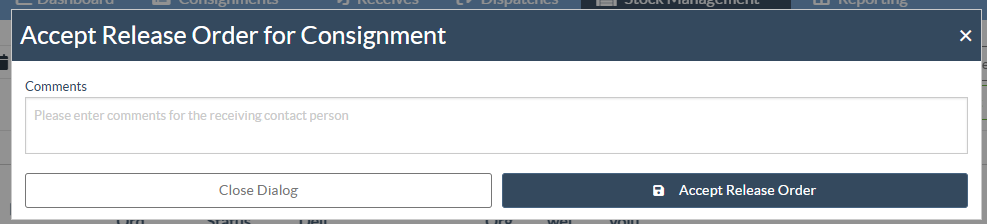
- Accept release order to approve the release request. The operator may enter any relevant instructions or comments for the cargo owner before confirming the approval. These comments are shared through the RITA interface.
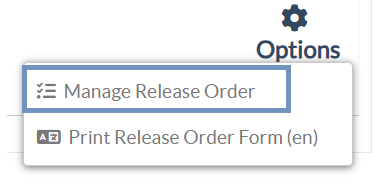
Upon acceptance of a Release Order, the operator can manage and process the release by selecting the “Manage Release Order” option.
After clicking “Manage Release Order”, A release window will open, and the user will be asked whether the cargo is to be released to the customer at the warehouse or storage facility.
If “Yes” is selected, the user must provide the release details, including the person receiving the cargo.
If “No” is selected, the system displays the list of planned journeys to which the release can be assigned.
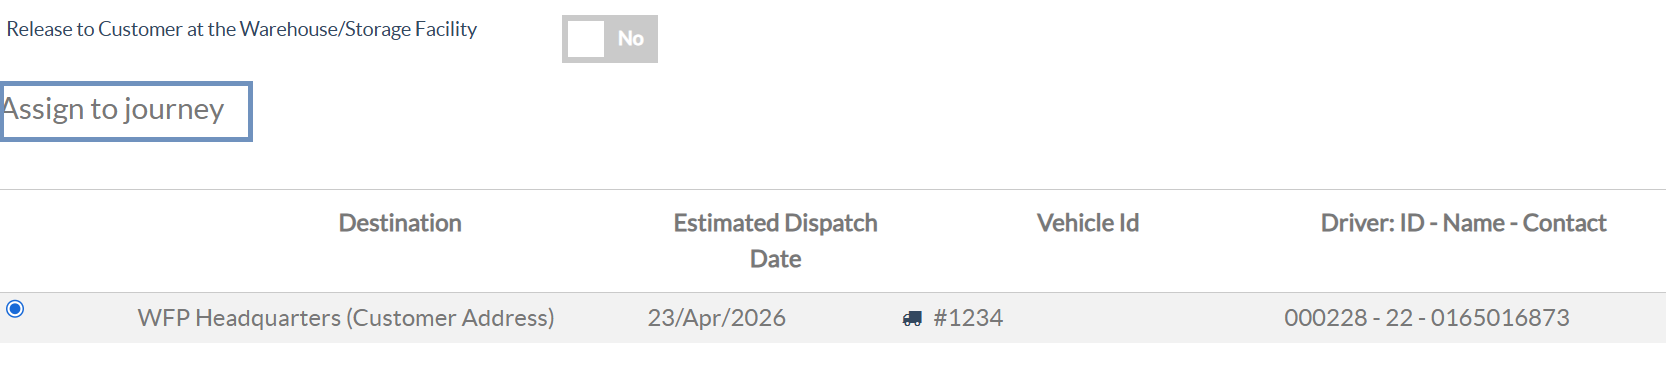
Enter the quantity to be released and click “Assign to Journey.”
|
The Stock Management Planning tab enables RITA operators to manage the current stock. They can view consignment details using the "stock disposition screen," register any losses or damages occurred during storage, release goods to the final customer, and print stock cards.
|
If the RITA operator received the cargo using the waybill number, they can receive and release it simultaneously.
- Click on “Receive Waybill", and a dialog box appears
- Input Quantity Received
- Click on the “Receive and Release” button
New Window “Release Details” opens.
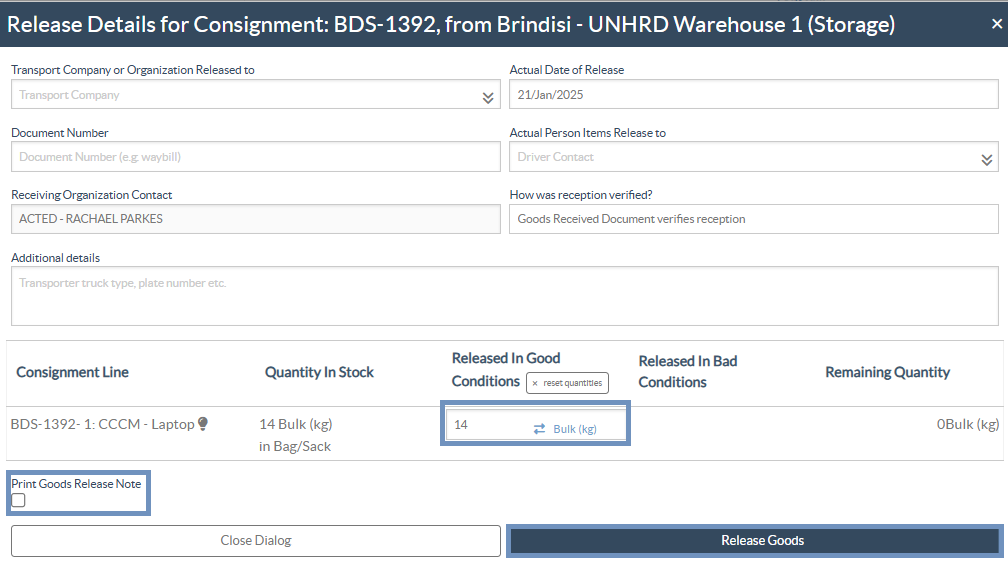
- Confirm the number of items to be released.
- Input the required document and release information.
- Click on "Release Goods".
The “Print Goods Release Note” option allows warehouse managers to generate goods release notes automatically from RITA.
RITA distinguishes between the two types of cargo releases:
When the cargo is released directly to the customer, follow the steps below:
- Go to the Planning tab on the Stock Management page and filter the consignment you want to release.
- Click on Options and choose “Release to Customer.”.
When the cargo is transported and released to the customer, follow the steps below:
- Crete new journey and dispatch the cargo as explained in paragraph 4.
- Go to the “Planning tab” on the stock management page and filter the consignment you want to release.
- The consignment will be listed under “Customer Address”; select “Release to the customer.”
- The release box will appear; provide the required release information and click “Release Goods.”
6. Inventory Counts
This function enables RITA users to conduct and manage physical inventories directly within RITA. To do so, click "Inventory Count" from the "Stock Management Tab."

Click on “Start Inventory Count”

Select the location (warehouse) where you want to conduct a physical inventory. The users will be asked to confirm the physical county directly through a special inventory count screen.
|
Selecting and starting a warehouse for conducting physical inventory will freeze all transactions in the warehouse and enable warehouse teams to conduct full counts. The inventory count cannot be conducted if there are planned transfers or committed stock in the warehouse.
|
Any losses or damage will be registered, and loss reports can be generated directly from the screen. The system will keep a record of all past inventories, and users will be able to generate reports for future needs.
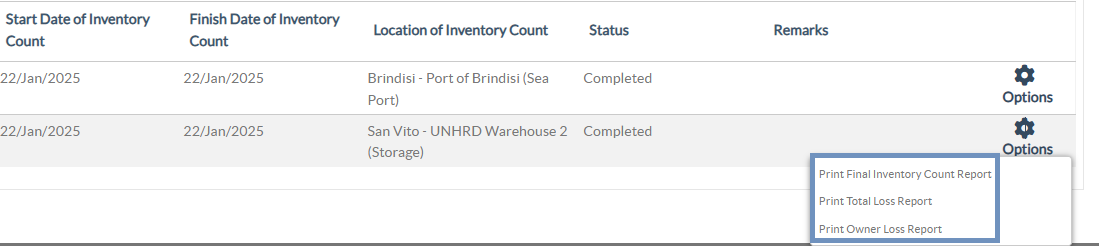
|
RITA lets users print the "Inventory Count Sheet" with the "Blind Count" option, which excludes item counts for consignment line items in the warehouse.
|
